How to generate reports in CloudRanger
This article applies to:
- Product edition: CloudRanger
Overview
CloudRanger reports provide details about tasks carried out for backup policies, server schedules, and disaster recovery within a certain time period. A report can be generated either for backup policies, disaster recovery (DR) plans, or server schedules. Additionally, a report can be customized to provide details about specific backup policies, DR plans, or server schedules by applying appropriate filters. Reports can be generated daily, weekly, monthly, yearly, and for a specified date range.
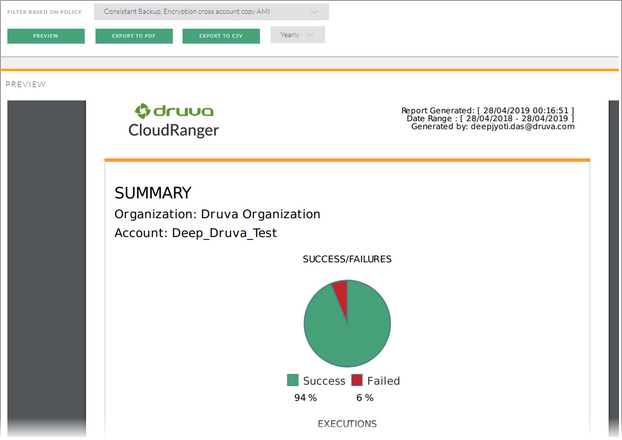
Every report has the below three columns along with a Success/Failure graph and Pie chart
- Date: Time when the task got executed.
- Server: Name of the server for which the task was executed
- State: Status of the task after completion
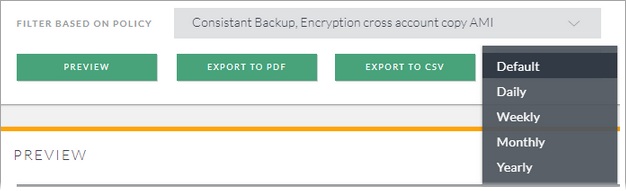
Once a report is generated, you can export it either as a csv or a pdf file.
Generate reports
On the CloudRanger console:
- Click Settings icon
 to open the Account Settings page.
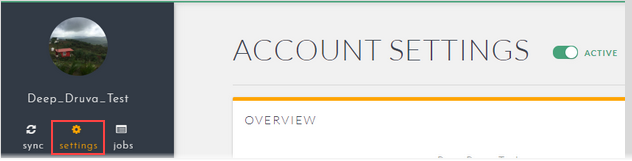
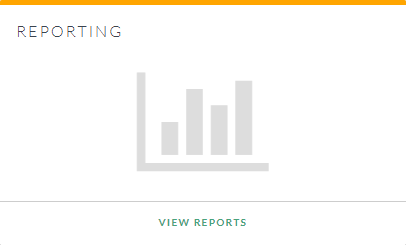
- Click View Reports under Reporting.
- Apply the appropriate filters to generate the reports related to backup policies, DR plans, and server schedules. You can apply filters as follows:
- START DATE and END DATE - To generate a report of tasks completed within the specified dates.
- Policies, Disaster recovery plans, or Server schedules - To generate a report of tasks related to specific backup policies, DR plans, or server schedules.
- Select All - To generate a report of tasks related to either all backup policies, DR plans, or server schedules.
- Daily, Weekly, Monthly, or Yearly - To generate a report at regular intervals.
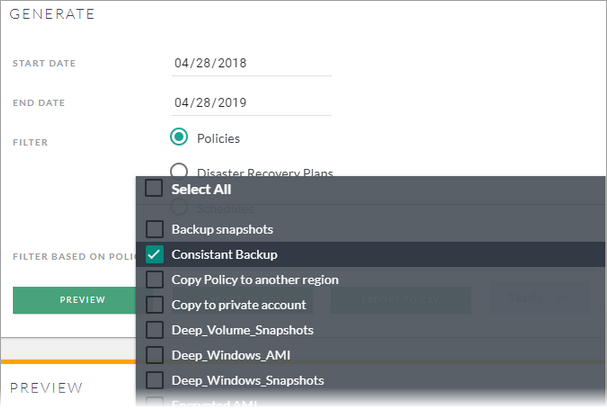
- After specifying all the parameters, click Preview to generate and view the report.
- Use the Export to PDF or Export to CSV to export the report in the desired format.