Manage Users from Okta using SCIM
Overview
This article lists the steps to integrate Okta with Druva inSync for managing users using SCIM 2.0.
Supported provisioning actions
The following SCIM provisioning actions are supported:
- Creation of individual user accounts
- Update to user account status and information. The following information updates are supported currently:
- Display Name (combination of First Name + Last Name) update
- Email address update
- User account status update. Change of user account status from active to de-active, and de-active to active only.
- Deactivation or deletion of user accounts
Deactivation or deletion of a user in the IdP leads to the preservation of the user account in Druva inSync.
Pre-requisites
- You must have configured Druva inSync to manage users using SCIM. For more information, see Configure Druva inSync to manage users using SCIM.
- Keep the token, that you generated earlier while configuring inSync for SCIM, ready. Generate one if you have not generated it earlier. For more information, see Configure inSync to manage users using SCIM.
- Login into Okta as an administrator. You either must be a super administrator or have an administrator account with the rights to create and manage apps.
Procedure
The following steps are specific to Okta and can be performed in the Classic UI of the Okta Administrator Console.
1. Configure Druva 2.0 app for user provisioning
Druva has its pre-configured SCIM app - 'Druva 2.0' in the Okta Administrator Console. Use this app to quickly configure and start provisioning users in Druva inSync.
The same Druva 2.0 app can be used to configure both SCIM and SSO.
Procedure
- If you are using the Okta Developer Console, select Classic UI in the drop-down menu located above the Okta menu bar.
- On the Okta menu bar, click Applications > Applications.
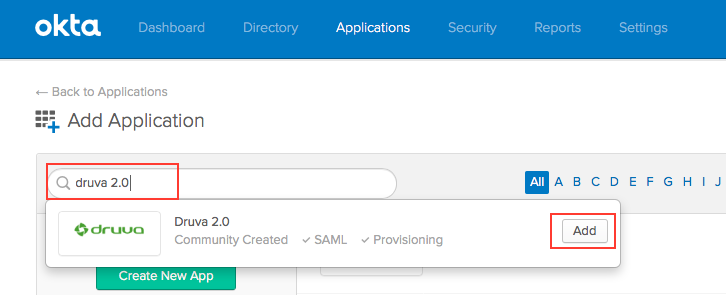
- On the Applications page, click Add Application.
- On the Add Application page, search for the Druva 2.0 application and click Add.
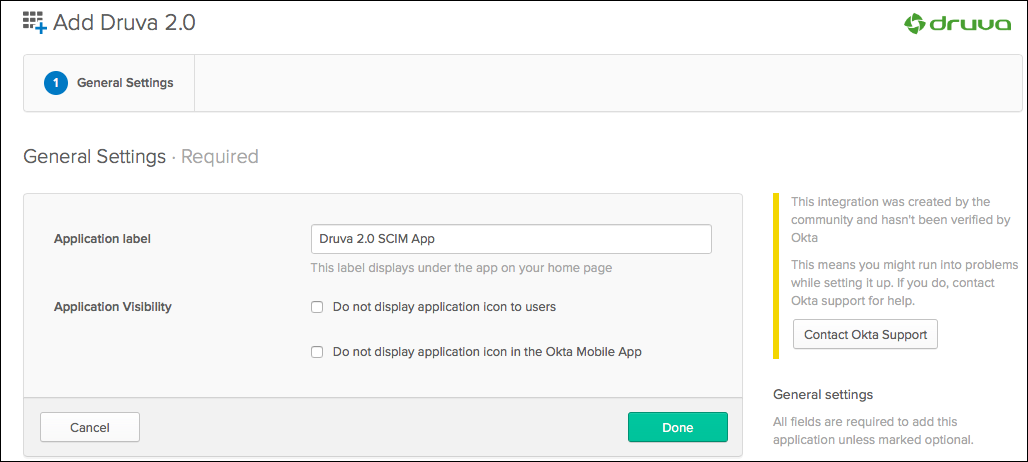
- On the Add Druva 2.0 page, configure the General Settings as per your requirement and click Done.
- On the Druva 2.0 app details page, click the Sign On tab and then click Edit.
Note: This article assumes you are only configuring SCIM for user management. If you also want to configure Single Sign-on (SSO) using Druva 2.0 app, see, How to configure SSO for Druva Cloud Platform using Okta as IdP.
- Under Settings, scroll down until you see the ADVANCED SIGN-ON SETTINGS area.
- In the SAML Auth Token field, enter any string. Example - ThisxxIsxxAxxSamplexxString.
- Under CREDENTIAL DETAILS area, select Email as the Application Username Format.
- Click Save.

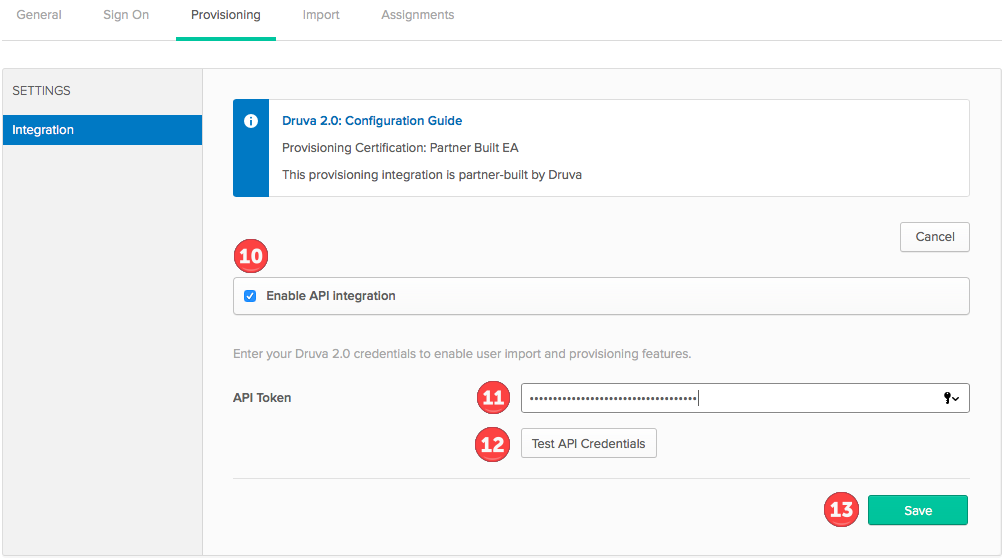
- Now, click the Provisioning tab.
- Select Enable API Integration check box to configure API integration.
- In the API Token box, enter the token that you generated in the inSync Management Console for SCIM-based user management.
- Click Test API Credentials to test your integration.
- If the test is successful, click Save.
The test is successful for the following provisioning features:
- Create users
- Update user attributes
-
Now, configure the Druva 2.0 app to enable provisioning actions and add custom attributes. For more information, see
2. Configure the Druva 2.0 app provisioning settings
You must manually enable the following supported provisioning actions in the Druva 2.0 app:
- Create Users
- Update User Attributes
- Deactivate Users
The Druva 2.0 app comes with the pre-configured default base attributes and values which are mandatory in Druva inSync. You can also add or define your custom SCIM attributes that you plan to use in the SCIM mapping to classify the users in Druva inSync.
You must map the userPrincipalName custom attribute to value.
- If the userPrincipalName custom attribute is not specified, the displayName attribute value is populated as the userPrincipalName attribute value in the inSync Management Console.
- If you have configured Cloud Apps for backup, by default, Druva inSync uses the email address of inSync users. You can configure inSync to use the User Principal Name (UPN).
- The custom attributes, except the userPrincipalName custom attribute, that you map in the IdP are not stored in Druva inSync. Custom attributes are only used to evaluate the SCIM mappings that you create in the Druva inSync Management Console.
Procedure
- Search for the SCIM app in the list of applications and open it.
- Click the Provisioning tab.
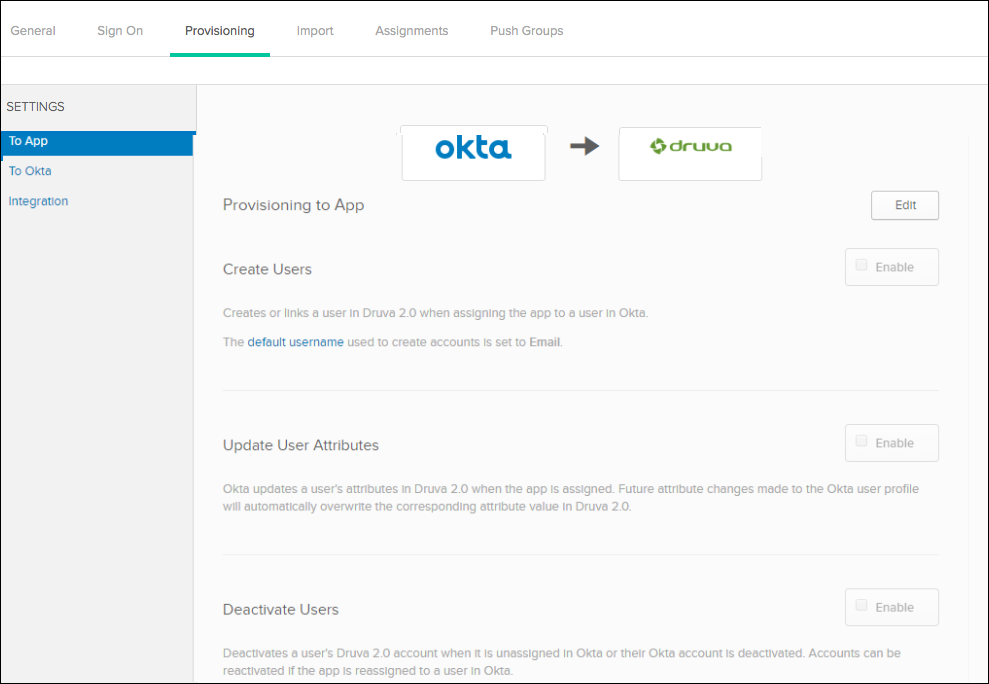
- In the left-hand side panel, select To App tab.
- In the right-hand side panel, click Edit to select the provision the SCIM app with Okta attributes.
- Select Enable for the following actions:
- Create Users
- Update User Attributes
- Deactivate Users
- Click Save.
- Now, scroll down until you see the Attribute Mapping section. Define the value for the custom attributes that you want to use in Druva inSync to create a SCIM mapping for classifying users.
- The last step of the SCIM app configuration is to assign the SCIM app to the users and groups that you want to manage in Druva inSync. For more information, see Assign users to the SCIM app.
3. Provisioning users from OKTA using custom attributes
Procedure
- Search for the SCIM app in the list of applications and open it.
- Click the Provisioning tab.
- In the left-hand side panel, select To App tab.
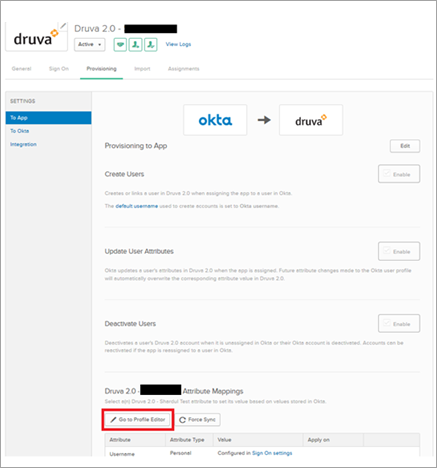
- Scroll down until you see the Attribute Mapping section. Define the value for the custom attributes that you want to use in Druva inSync to create a SCIM mapping for classifying users.
- Click on Go to Profile Editor.
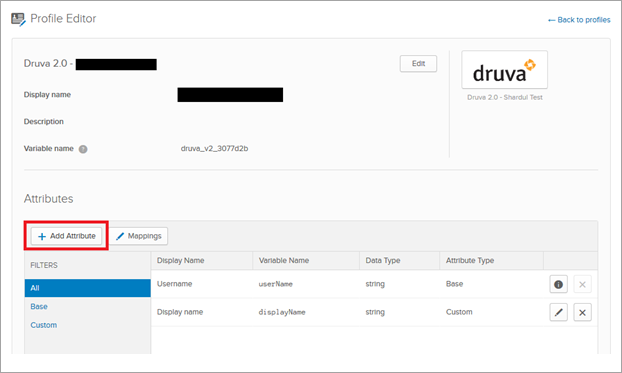
- On the Profile Editor page, under the Attributes section, click on Add Attribute.
- As displayed in the following image, enter the values as specified in the following fields.
Note: This example demonstrates the mapping of countryCode attribute. You can choose any other attribute as required.
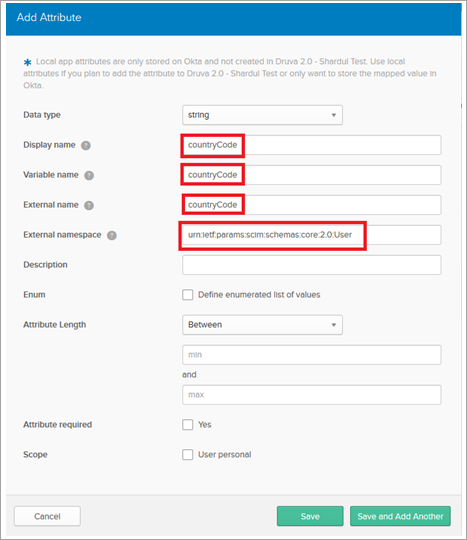
- Data Type: string
- Display Name: countryCode
- Variable Name: countryCode
- External Name: countryCode
- External Namespace: urn:ietf:params:scim:schemas:core:2.0:User
- Click Save.
- On the Profile Editor page, under the Attributes section, click on Mappings.
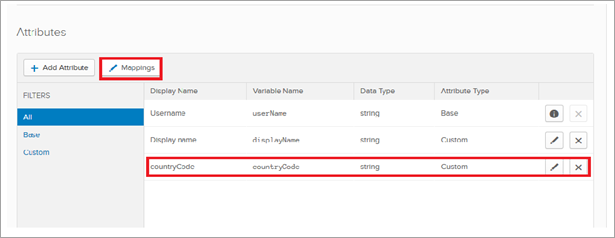
- Click on the Okta to Druva 2.0 tab.
- On the left-hand side, select the correct attribute from the drop-down and map it to the custom attribute that was created in Step 9.
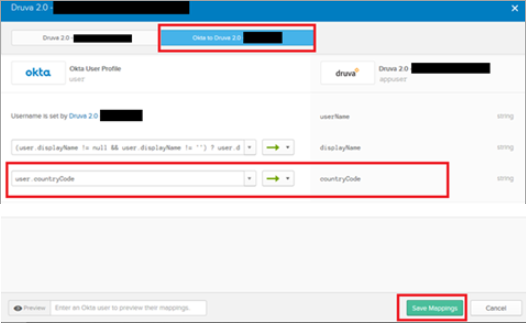
- Click Save Mappings.
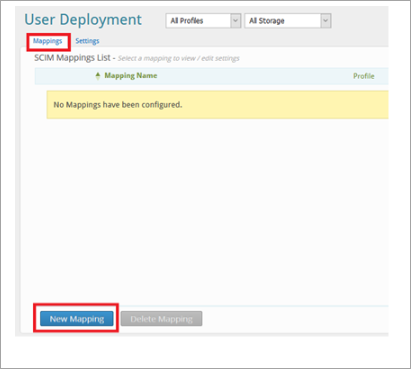
- Log into the inSync Management Console and click Manage > Users > Mappings.
- Click New Mapping to create a new mapping.
- While you create a new mapping, you must use the exact syntax of the custom attribute that you created in Step 9 in OKTA, under the Attribute name field.
- Provide the value of this attribute under the Value(s) field. This is the value of the attribute that will be verified by the SCIM App in OKTA with the OKTA users’ attributes. If the values match, then those users will get provisioned to inSync Cloud’s profile that is defined in the Mapping as follows:
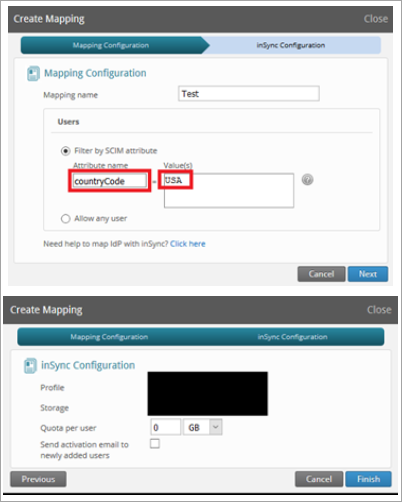
- Click Finish.
4. Assign users to the Druva 2.0 app
The last step of the Druva 2.0 app configuration is to assign the Druva 2.0 app to the users and groups that you want to manage in Druva inSync.
You can assign the Druva 2.0 app to Groups that you have created in Okta if you want to bulk assign it to the users. All the users in the group are automatically assigned the Druva 2.0 app, and their accounts are created in Druva inSync.
Procedure
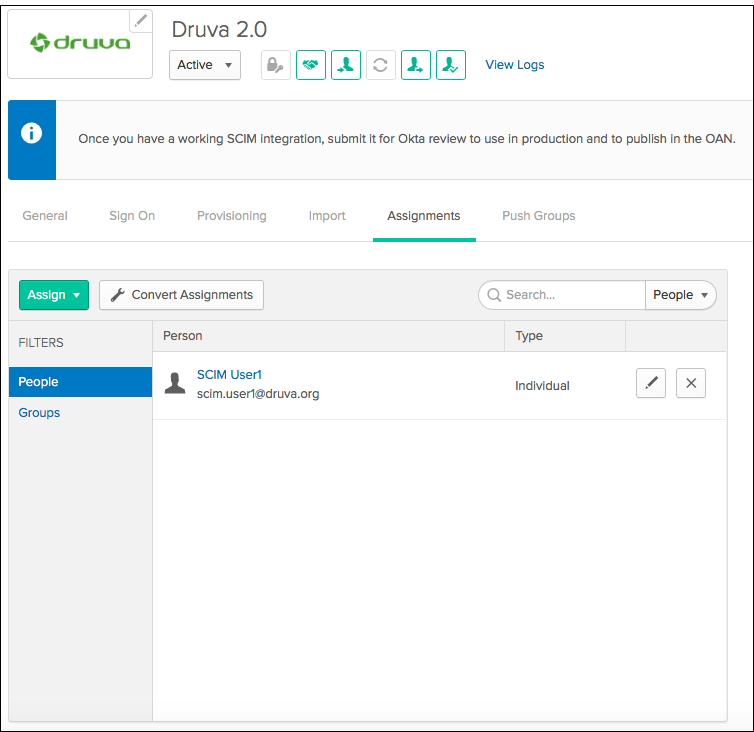
- Search for the Druva 2.0 app in the list of applications and open it.
- Click the Assignments tab.
- Click Assign > Assign to People, if you want to assign the Druva 2.0 app individually to the users.
OR
Click Assign > Assign to Groups if you want to assign the Druva 2.0 app to groups containing users. - Assign the Druva 2.0 app to users or groups, based on your preference.
Ensure you assign the Druva 2.0 app to every user whose account you want to manage in Druva inSync. After you assign the Druva 2.0 app to the users, their accounts are automatically created in Druva inSync and configured as per the SCIM mapping.
If you also want to configure SSO using the Druva 2.0 app, see How to configure SSO for Druva Cloud Platform using Okta as IdP.
Next step
View the user accounts managed using SCIM
inSync administrators can view the account created and managed using SCIM in the inSync Management Console.
- Manage Users page - The Manage Users page lists all the users created and managed in Druva inSync. For more information, see Manage Users page.
- User Provisioning Report - This report lists the user accounts created and managed using SCIM and also displays information like the account status, profile, and storage assigned to the users. For more information, see User Provisioning Report.
If the Username of the users managed using SCIM has special characters ?, *, /, \, < or >, they are automatically replaced by a _ (underscore).