Better Help Ahead
Redirecting to our improved help portal. If you're not redirected, click here.
License editions: To understand the applicable license editions, see
Plans & Pricing.
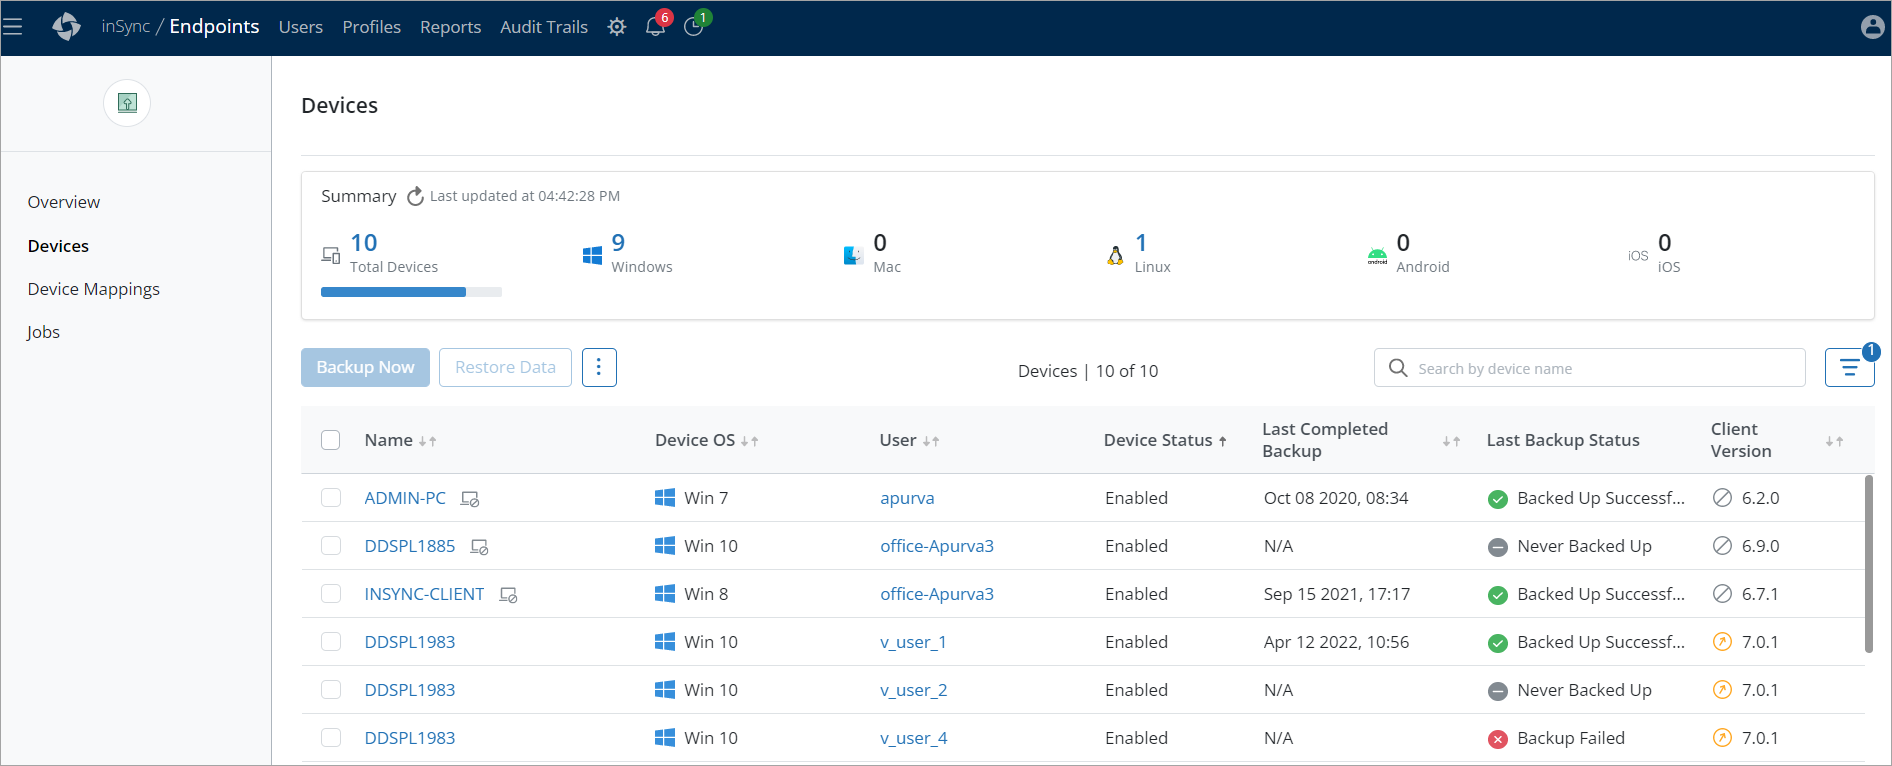
Overview
This page lists all the devices on which the Client is installed, along with details such as the device status, the last backup status of Client, the time of the last backup, operating system, and the current Client version.
Note: Only an administrator with User Management rights can perform all actions on the Devices page. If the administrator does not have User Management rights, then he can only view, but cannot perform any actions.
Access Path
-
Click the Endpoints workload to access the Endpoints Overview page.
-
Click Devices from the left navigation pane.
Alternatively, you can access the Devices page from the Druva Cloud Platform console >Data Protection section.
Search Devices
To search for a given device, type the device name in the Search box located at the top-right corner of the Devices page and press Enter.
Filter Devices
You can filter the result set to search for devices.
-
Applying filters - To apply filters on the Devices page, click the filer option, select the filters you would like to apply, and click Apply. You can filter based on the Device OS, Profile, Last Backup Status, Device Status, and Device Connectivity.
-
To cancel the filters applied, use the Reset button.
Devices
The following table describes each field on the Devices page.
In the list view, 100 devices are displayed by default. You can use the scroll bar to view the next set of devices in batches of 100.
|
Field
|
Description
|
|
Summary
|
The summary section enables you to view:
-
Total count of devices. Hover over the blue horizontal bar below Total Devices to view the count of enabled and disabled devices. By default, total devices are displayed.
-
Operating system-based devices count. Click the operating system count to filter the list of devices based on the operating system. For example, as per the above image, clicking 4 Mac will display 4 devices that are running on the Mac operating system.
Note: The statistics on the Summary card are refreshed every 7 minutes.
|
|
Name
|
The name of the device. Click the device name to access the Device details page.
The hostname is checked in every backup cycle. If the hostname of the device gets changed, it will automatically get updated in Endpoints.
The following symbols are displayed adjacent to the name of the device, based on their configuration:
 - This symbol indicates that the device is on Legal Hold. You cannot delete a device that is put on Legal Hold. For more information, see About Legal Hold. - This symbol indicates that the device is on Legal Hold. You cannot delete a device that is put on Legal Hold. For more information, see About Legal Hold.
 - Persona backup is configured for the device. For more information, see About Persona Backup. - Persona backup is configured for the device. For more information, see About Persona Backup.
Below symbol indicates that the device is inactive (the device is not connected for a specific number of days).
 
Hover over the inactive device icon to view the last connectivity details.
|
|
Device OS
|
The name of the operating system running on the user’s device such as Win10, Catalina, CentOS, iOS, etc.
|
|
User
|
The name of the user. Click the user name to access the User details page.
|
|
Device Status
|
The status of the backup of the device - Enabled or Disabled.
|
|
Last Completed Backup
|
The date and time when data was last backed up from the device.
|
|
Last Backup Status
|
The last backup status of the device. The following statuses will be displayed based on the backup status:
-
Backed up successfully - This status is displayed when the last backup of the device is successful.
-
Backup failed - This status is displayed when the last backup of the device failed.
-
Backed up with errors - This status is displayed when a few files were not backed up.
-
Backup throttled - This status is displayed when the last backup of the device stopped due to throttling errors such as HTTP 429.
-
Never backed up - This status is displayed when devices are never backed up.
|
|
Client Version
|
The version of the Client installed on the device.
The following statuses will be displayed adjacent to the Client Version column based on the Client upgrade status.
-
Upgraded - The Client is on the latest version.
-
Scheduled - The Client is scheduled for an upgrade.
-
Failed - The Client upgrade failed.
-
Upgradeable - The current Client version can be upgraded to the latest available version.
-
Non-upgradeable - The current Client version cannot be upgraded to the latest version.
|
Actions on the Devices page
|
Field
|
Description
|
|
Backup Now
|
To start a backup operation:
-
Select the device and click the Backup Now button located on the left upper side of the UI.
-
On the confirmation window, click Backup Now. The backup process will be scheduled and you can track its progress in the Live Activities.
|
|
Restore Data
|
To restore data to a device:
-
Select the device from which you want to restore the user data and click the Restore Data button located on the left upper side of the UI.
-
On the Restore Data window:
-
In the Snapshot Viewer section, click the  button to view snapshots from which you want to restore the data. By default, Curated Snapshot is selected for restoring endpoint data if the Ransomware Recovery service is enabled for your organization and administrators have created a Curated Snapshot for endpoints. You can also select from the Snapshots section by clicking either the Last 24 Hrs, Last 7 Days, or Earlier option and selecting the required time. button to view snapshots from which you want to restore the data. By default, Curated Snapshot is selected for restoring endpoint data if the Ransomware Recovery service is enabled for your organization and administrators have created a Curated Snapshot for endpoints. You can also select from the Snapshots section by clicking either the Last 24 Hrs, Last 7 Days, or Earlier option and selecting the required time.
-
Select the folder that you want to restore and click Restore.
-
On the Restore to Device window, select one of the following options:
-
Click Restore. The restore request is created. You can track all the ongoing restore activities through the Live Activities page. To view the status of the restore activities, see the Jobs page. After the restore operation is completed, you can click View Details to view the restore details.
See Restore Data for more details.
|
|
Upgrade Client
|
To upgrade to the latest Client version, select the device, click the 3-dot menu and click Upgrade Client button to schedule for auto-upgrade. You can also select multiple devices.
Note: You cannot auto-upgrade the device on Linux OS.
|
|
Enable
|
To enable a disabled device:
-
Select the device, click the 3-dot menu, and click the Enable button.
-
On the confirmation window, click Enable. Now the user of the selected device can take a backup of the device.
You can also select multiple devices.
Note: If you disable a preserved user, you cannot enable it from the Devices UI.
|
|
Disable
|
To disable an enabled device:
-
Select the device, click 3-dot and click Disable button.
-
On the confirmation window, click Disable. Once disabled, the user cannot take backup of the device.
You can also select multiple devices.
|
|
Delete
|
Note: You cannot delete a device if it is associated with a user whose profile is enabled with Data Lock.
To delete a device:
-
Select the device. From the 3-dot, click the Delete button.
-
On the Confirmation window, specify the reason for deletion (the reason is mandatory with a character limit between 10-150). This capability will help prevent accidental deletions. The reason for deletion will be captured in the Admin Audit Trail for auditing purposes.
-
Click Delete. You can also delete multiple devices.
The device will be deleted temporarily. You can rollback the deleted device via UI, background jobs, or API within a configurable rollback window. After the rollback window expires, the device will be deleted permanently. See Rollback Actions for details.
-
To use Rollback Actions, you need the Security Essentials license. Contact Support to obtain the license. Currently, this feature is available only for Druva Public Cloud customers.
-
Refer to Required permissions for information regarding Rollback permissions.
Rollback Considerations:
-
The rollback activity will be captured in the Admin Audit trail for auditing purposes.
-
Even if the replace_samehost flag is set to True and the device with the same name exists for a user, the device is rolled back by appending a number to the device name (for example, devicename1).
-
You cannot rollback a device if:
-
The user with which the device is associated is deleted. To rollback the device, you need to rollback the user first.
-
The user's profile with which the device is associated is changed. To roll back this device, you need to change the user's profile to the previous one.
-
The active license limit of the user with which the device is associated has reached the threshold. Contact Support to procure additional licenses.
-
The total count of devices exceeds the device count allowed per profile. You need to delete the device or edit the profile to increase the total device count and then roll back this device.
|
|
Sort
|
On the Devices page, use the down or up arrow next to Name, Device OS, User, Device Status, last backup status, and client version columns to sort them in ascending or descending order.
|
Note: You can track all activities in the administrator Audit trails.