A walkthrough of the Druva CloudRanger console
Users provisioned with a Druva Cloud Platform account will now navigate to CloudRanger from the integrated DCP console. If you are provisioned with a Druva Cloud Platform account, proceed to log into Native Workloads using your SSO credentials.
The CloudRanger console is the starting point from where you administer data backed up from the configured data sources. Once you log into CloudRanger, you will be navigated to the global dashboard of your Default Organization.
Global Dashboard
The CloudRanger dashboard offers an enhanced view of the current status and historical trends of the latest backup and restore status, policies and disaster recovery plans, storage consumption, and jobs across accounts within your organization.
The Global Dashboard provides an at-a-glance view of the following components in one integrated console:
- Resource Summary: Provides an overview of total AWS resources that are Protected or Not Protected, categorized by Resource Type.
Simply hover over the interactive Resource Summary widget to know the exact number of resources that are Protected/Not Protected. - Overview: Summarized view of all AWS Accounts configured, the number of Policies and DR plans, as well as the number of snapshots archived within the selected organization.
- Backups and Restores: Provides information on the data backups and restores by AWS Region, within the selected organization.
- Disaster Recovery Plans: Summary of total number DR plans configured, and the number of DR plans with or without test executions, within the last 3 months.
- Jobs: View of UI-triggered jobs for the selected organization within the last 30 days.
To navigate to your AWS Accounts listing page, select All AWS Accounts from the Accounts drop-down menu. Alternatively, select an individual account to navigate to the Account Dashboard.
AWS Accounts listing page
The AWS Accounts listing page displays all accounts configured within your chosen organization.
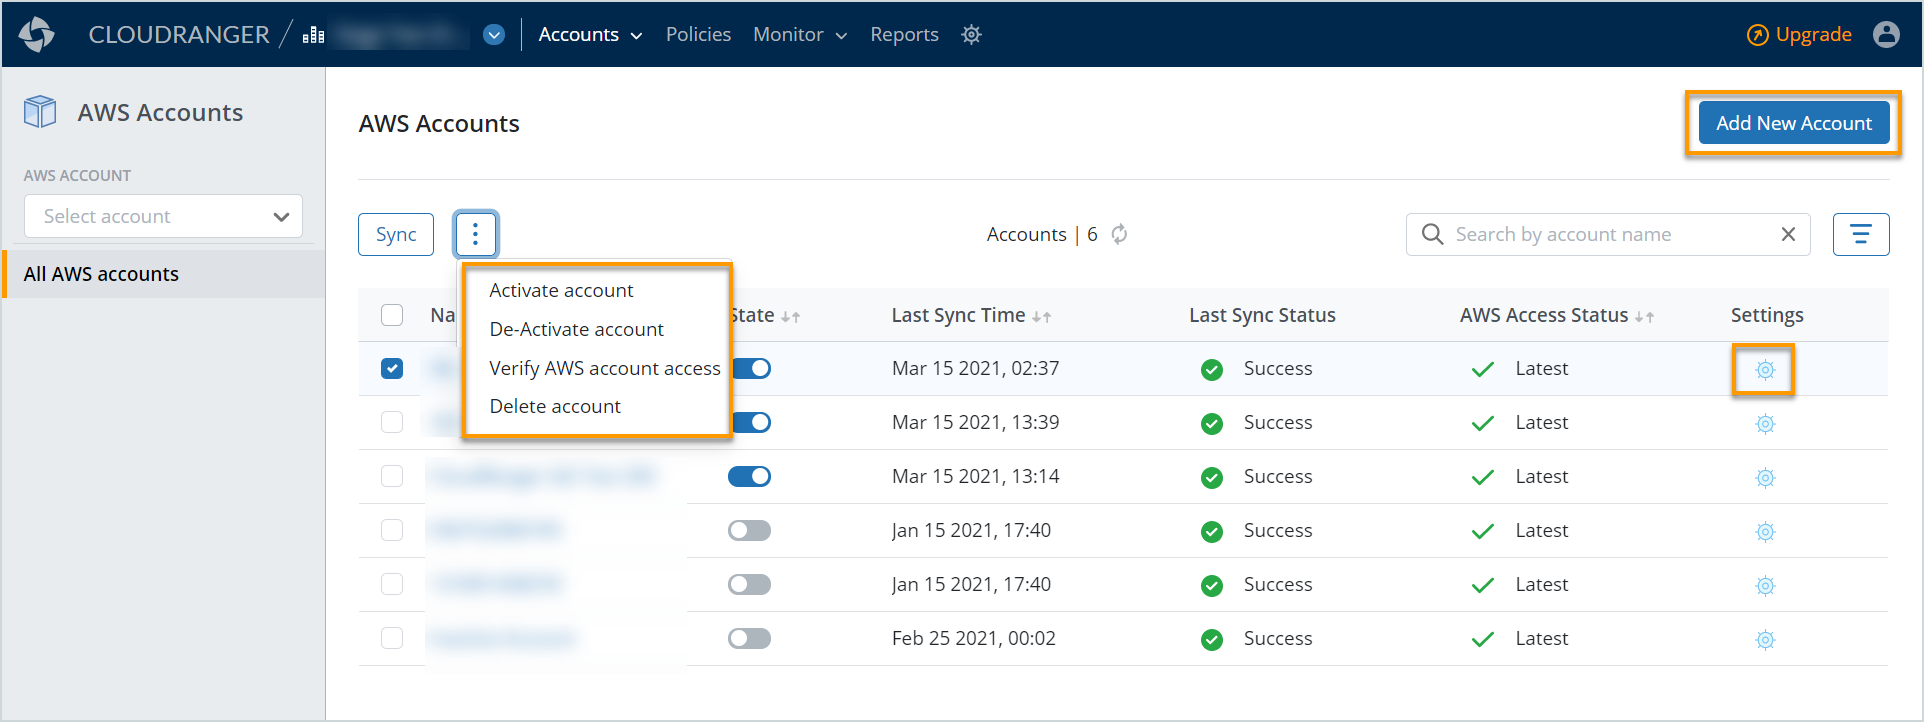
You may add or delete one or more accounts from your AWS Accounts page:
- Add Account: Click Add New Account on the top right to configure the AWS Access Role to your AWS environment, thus allowing CloudRanger to access and manage your AWS workloads. For more information, see Create an AWS Access Role.
Note: You may choose to add single or multiple accounts from your AWS Accounts page by provisioning a stack or stackset within your AWS environment. For more information, see Configure multiple AWS Accounts.
- Delete Account: Select the Account(s) to be deleted and then click
 . Select Delete account and confirm the deletion.
The AWS Accounts listing page allows you to update, manage, and configure your AWS accounts within your chosen Organization.
|
Field |
Description |
|
Name |
Click the Account Name to navigate to your Account-level administration dashboard from where you can easily configure your AWS Resources, manage resource backups and restores, DR plans, and schedules. |
|
State |
When a new Account is setup and synchronized with your AWS environment, the State toggle is set to Active by default. You can choose to set an Account to Active state or Disable it.
Note: Disabling an account suspends all associated activities including backup schedule, retention, disaster recovery, and resources schedules. |
|
Last Sync Time |
The time of previous synchronization with your AWS environment. Note: To initiate manual Sync with AWS, select an Account and then click Sync. |
|
Last Sync Status |
The status of the previous synchronization with your AWS environment.
|
|
Last Access Status |
The access status with your AWS environment.
Note: To verify the access status with your AWS environment, select an Account and then click Verify AWS account access. |
|
Settings |
Click |


 to view and manage Account Settings, such as account access, notifications, network settings, and user administration.
CloudRanger offers an intuitive user interface with the navigation organized into Organizational and Account-level configuration elements.
Organization-level administration
Use the top navigation bar to manage and administer the following globally across all AWS accounts within an organization.

- Policies: Backup policies are managed globally across all AWS accounts, but users can choose to apply a predefined policy to a specific AWS account
- Reports: End-to-end Reporting functionality that allows you to customize and subscribe to reports on Backup and Restore status, Resource protection status, Licensing, Schedules, EC2 Credit Storage Consumption, AMI deletion, and Disaster Recovery Plans, across AWS accounts.
- Monitor: Jobs are maintained at the organization level and offer an integrated view of all UI-triggered scheduled and maintenance activities. You may also view Audit Trail, as part of compliance and governance, where needed.
Note: The left navigation menu for Account-level administration can only be accessed once you navigate to a specific CloudRanger account. The top menu bar for Organization administration will, however, remain static and accessible at all times.
Organization Selector
CloudRanger brings to you the option to access multiple organizations and AWS accounts from within your console. You can select your Organization from the top navigation bar on your CloudRanger console.
Click the ![]() icon on the top navigation panel to select the appropriate organization. Once selected, the Accounts drop-down displays all AWS accounts linked to that Organization to which the user is granted access. In other words, the Account drop-down will be filtered based on the Organization selected and will display those Accounts within the Organization that is configured for the logged-in user.
icon on the top navigation panel to select the appropriate organization. Once selected, the Accounts drop-down displays all AWS accounts linked to that Organization to which the user is granted access. In other words, the Account drop-down will be filtered based on the Organization selected and will display those Accounts within the Organization that is configured for the logged-in user.
Organization management
Click the Settings gear icon on the top navigation bar to configure and manage the Organization Settings and Billing information for the user currently logged in.

Note: Organizations with no specific name defined on CloudRanger will display as a Default Organization. CloudRanger administrators can choose to update the Organization Name from the Organization Settings page. It is recommended that you assign unique Organization names to avoid multiple Default Organizations.
Account-level administration
Use the left navigation menu to manage and administer the following at the AWS Account level. You can easily configure and manage your AWS resources, backups, and restores, as well as manage DR plan and schedules at an account level:
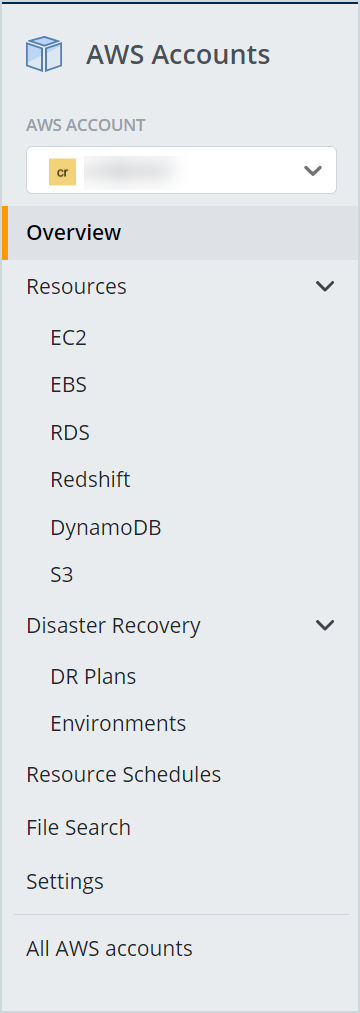
You can configure and manage the following at an account-specific level:
- Overview: The Dashboard provides an at-a-glance view of each account in one integrated console.
- Resources: Configure AWS Resources as well as create and manage resource backups and restores for EC2, EBS, RDS, DynamoDB, and Redshift resources.
- Disaster Recovery: Create and manage DR Plans and Environments.
- Resource Schedules: Manage on/off schedules for AWS resources and Auto-Scaling Groups.
- File Search: Search and recover files, in case of accidental deletions or as part of compliance and governance. to locate specific files within your backups using unique meta-data attributes.
- Settings: Manage account access, notifications, network settings, and user administration.
Account Dashboard
The Account Dashboard offers an enhanced view of the current status and historical trends of the latest backup and restore status, policies, and disaster recovery plans, and jobs within your selected account.
The CloudRanger Dashboard provides an at-a-glance view of the following components into one integrated console:
- Resources: An overview of the total AWS resources that are Protected or Not Protected, categorized by Resource Type.
- Overview: Summarized view of all AWS Accounts configured, the number of Policies and DR plans, as well as the number of snapshots archived within the selected account.
- Backups and Restores: Provides information on the data backups and restores by AWS Region, within the selected account.
- Disaster Recovery Plans: Summary of total number DR plans configured, and the number of DR plans with or without test executions, within the last 3 months.
- Jobs: View of UI-triggered jobs for the selected organization within the last 30 days.
Account Management
The Account settings allow you to access and manage the AWS accounts defined on CloudRanger. Click Settings on the left navigation menu to view and manage the following account settings:
- Account Overview: Account name and time zone settings.
- AWS Access: Configure and test your AWS access settings.
- Notifications: Manage notifications to be triggered and the intended recipients or webhooks
- Team: Add or manage team members with the permitted levels of access.
- Network settings: Manage the subnets that CloudRanger will apply on temporary instances for each region.
- File Search Settings: Enable File Indexing to define the accuracy of search in backups – a higher frequency of indexing enhances search accuracy, while also impacting costs.
Resources
CloudRanger simplifies and reduces costs associated with the complexity of data lifecycle management for AWS cloud workloads. You can now manage all aspects of the backup and restore lifecycle across multiple regions and AWS accounts, all via one unified console.
Once you add and sync your AWS account(s) with CloudRanger, all servers and resources linked to your AWS account including Amazon EC2, EBS, RDS, DynamoDB, and Redshift instances will be available on your CloudRanger console.
To view your resources, navigate to Resources and then select the resource type from the drop-down:
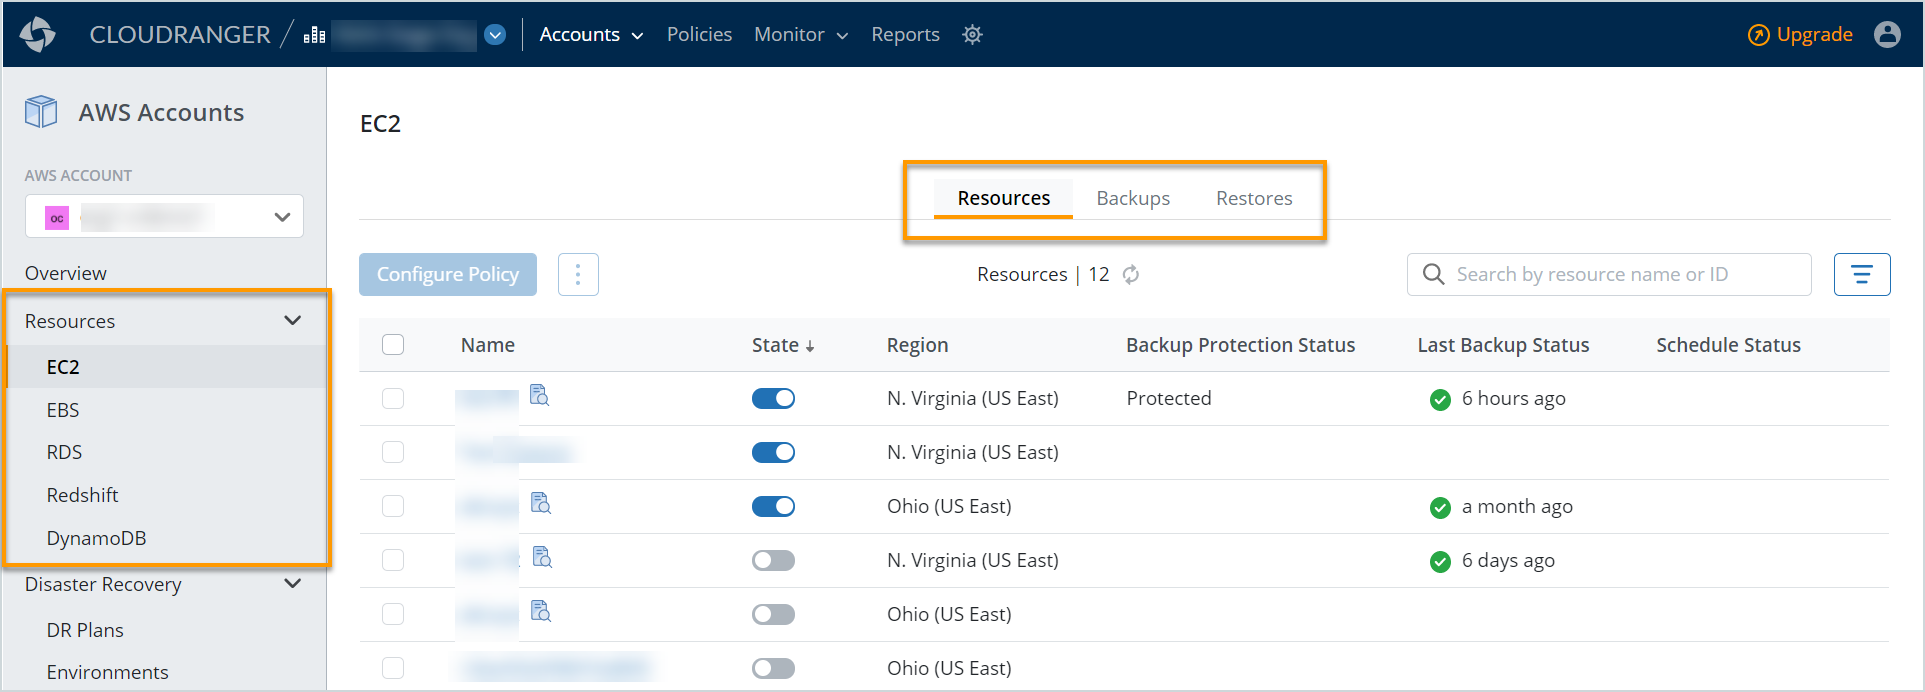
The Resource page displays all AWS Resources defined in CloudRanger, their current State, backup Region, Backup Protection Status, as well as their Last Backup and Schedule Status.
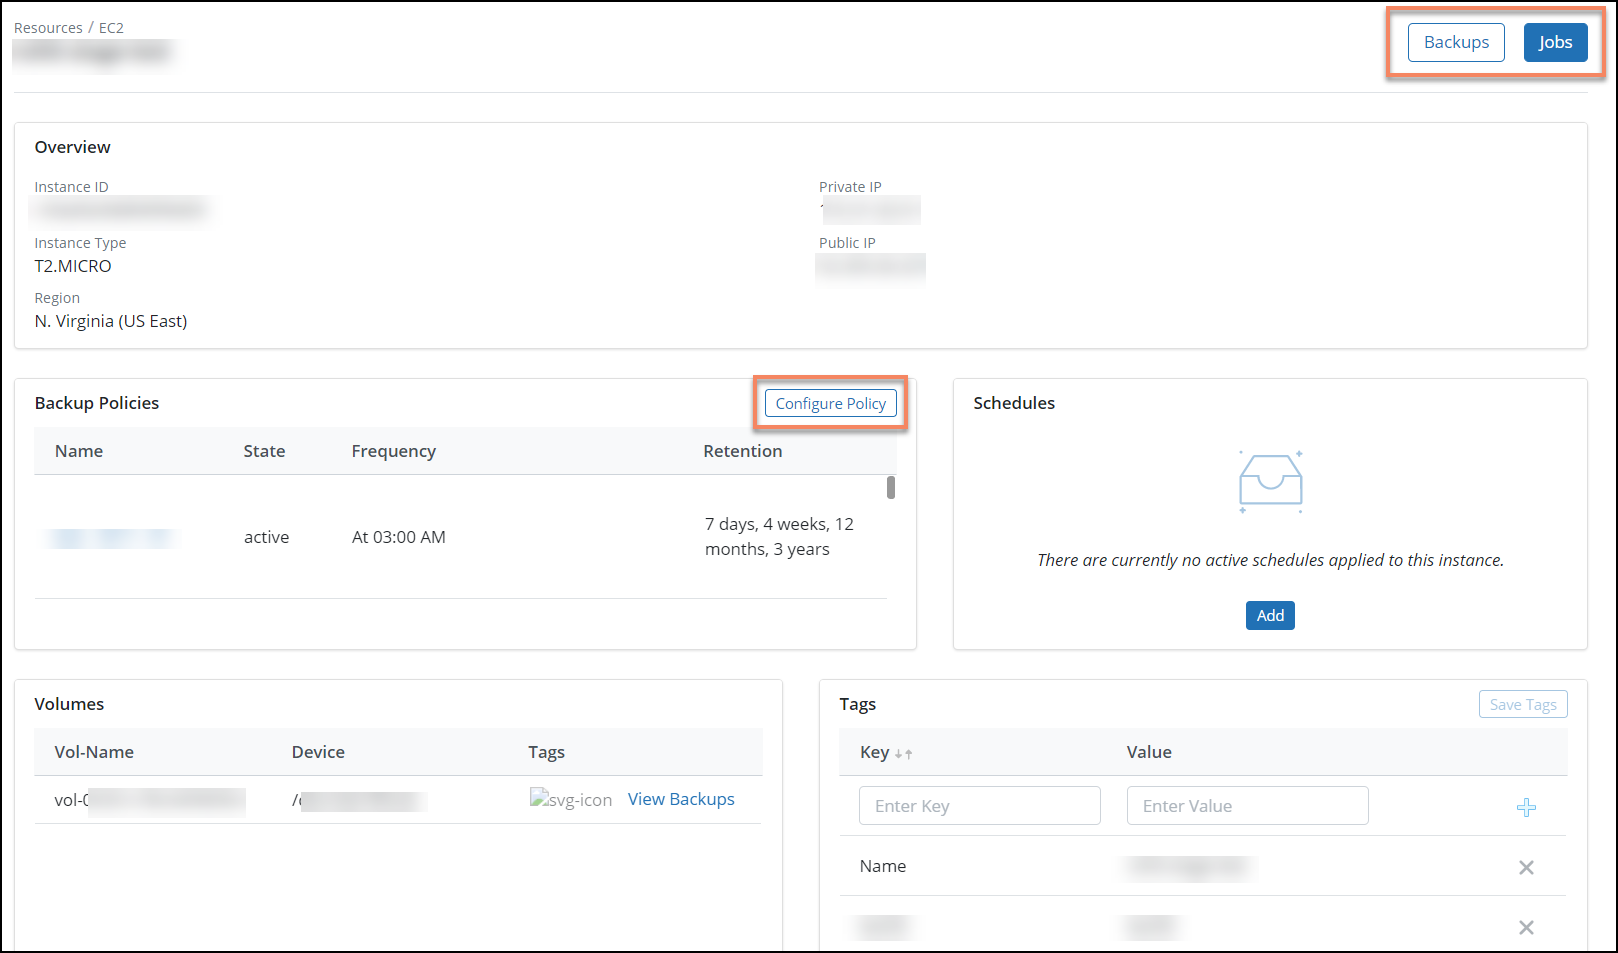
To view detailed information on each resource, click the resource Name.
Use the Search by resource name or ID text box to quickly locate a specific resource. You can also use the  icon to filter resources by Backup Protection Status, Schedule Status, Region, or Tags.
You can choose to automate your backup process using backup policies or generate a manual backup of a specific resource on CloudRanger.
Note: You can configure a backup policy or initiate a backup from the main Resource page. To apply a predefined backup policy to a specific resource, select the resource Name and click Configure Policy.
Resource backups
To access your resource backups, navigate to Resources, select the appropriate AWS resource type, and then click Backups.
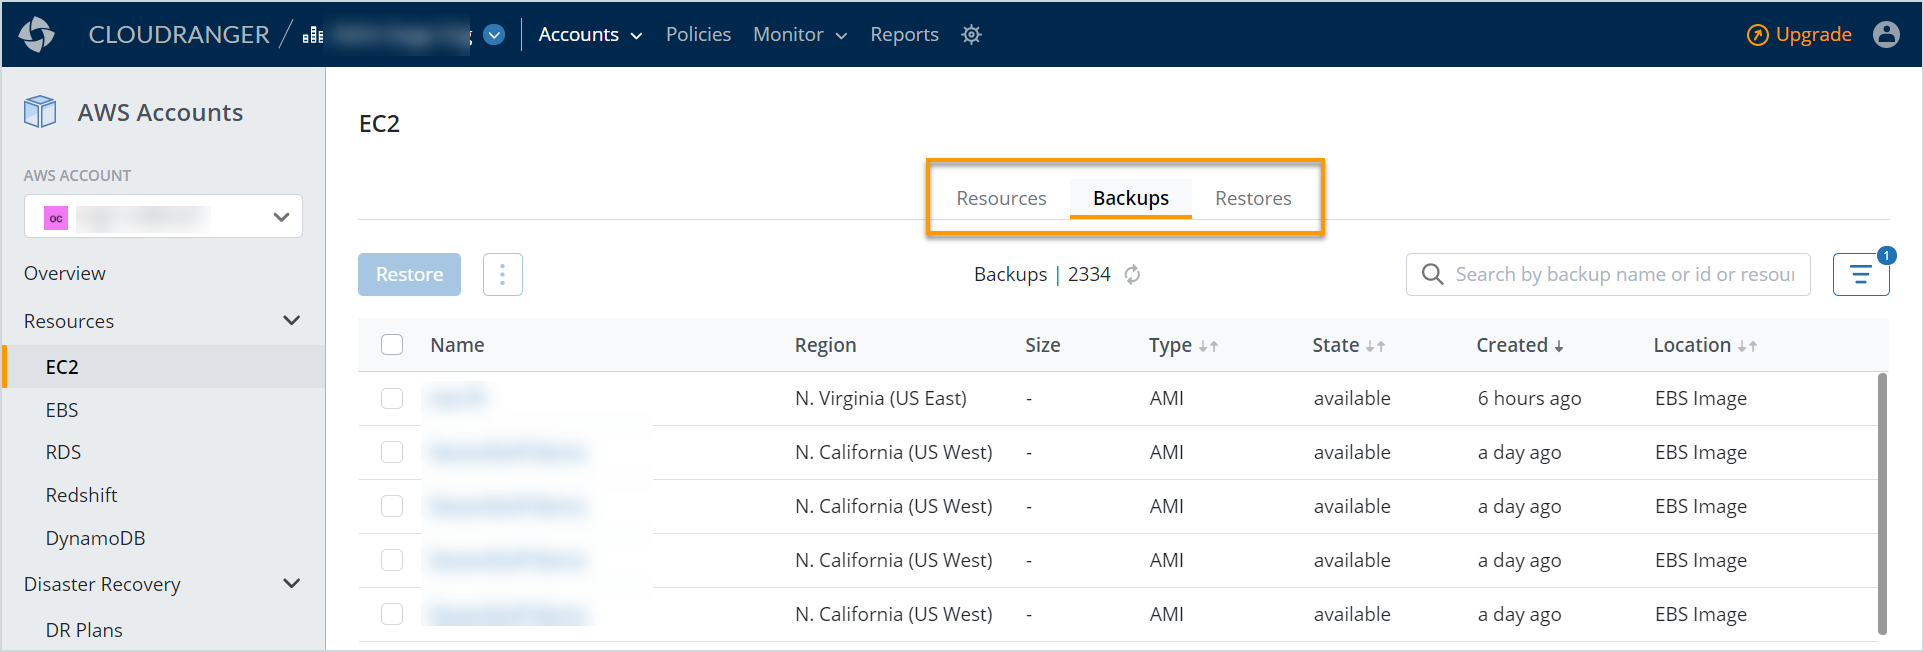
The Backups page displays the backup Region, Size, Type, State, Created, and the Location.
Use the Search by backup name or ID or resource name or ID text box to quickly locate a specific backup. You can also use the icon to filter backups by Type, Region, or Tags.
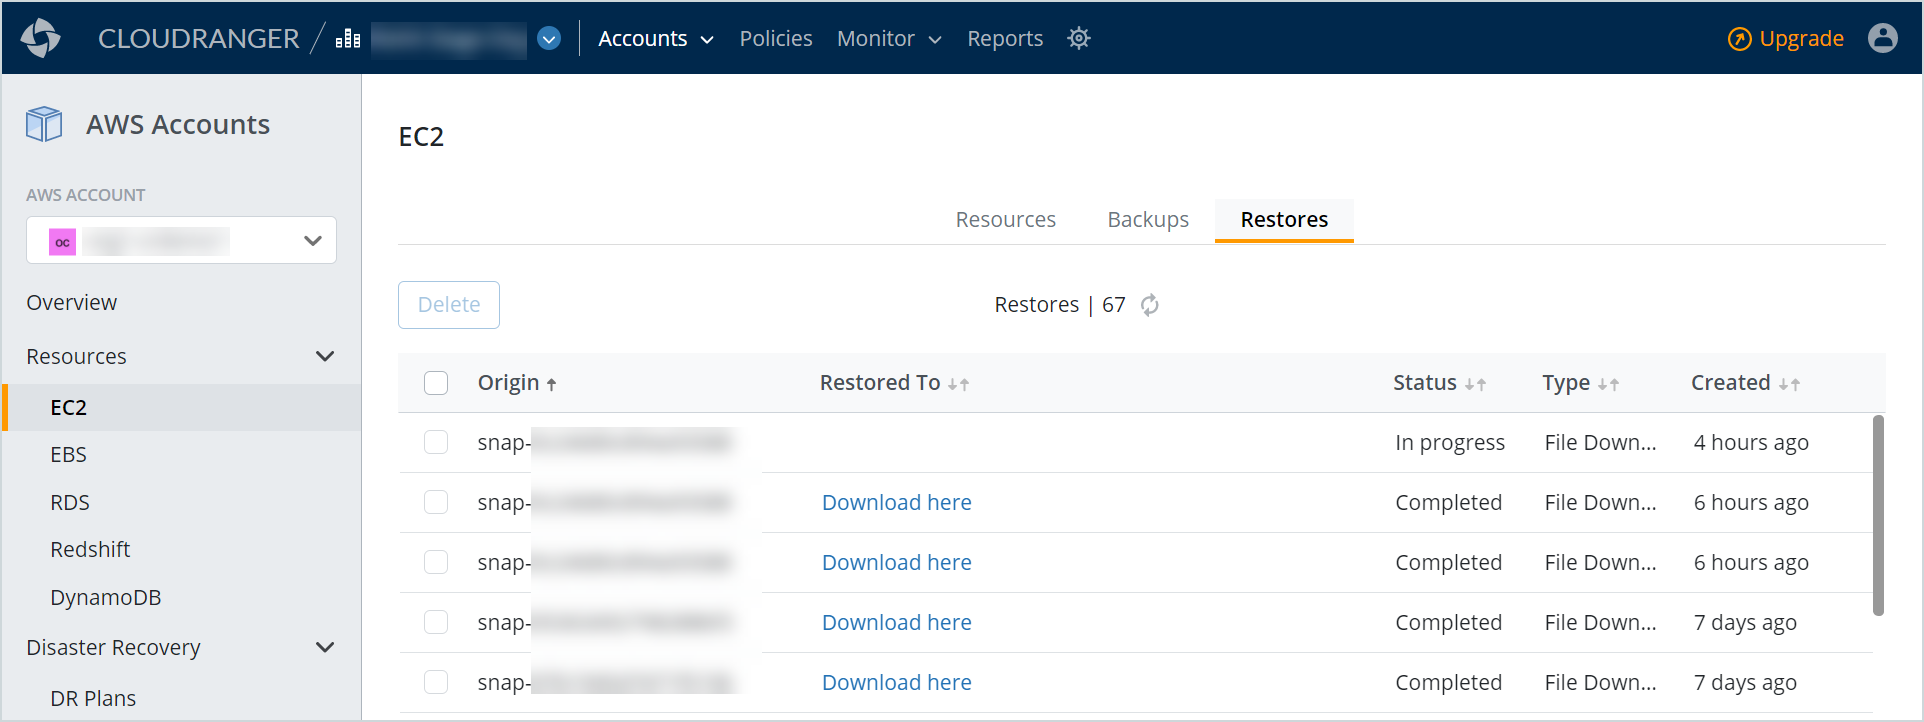
Restores
The restore process varies based on the resource type that has been backed-up. In general, the restore process depends on the backup type applied to the specific resource, that is, AMIs or snapshots.For example, you may choose to restore an EC2 instance from AMIs or snapshots. You can initiate restore as an instance, restore at the volume level, or request a file-level restore. On the other hand, RDS snapshots are restored as an RDS instance.
CloudRanger offers multiple approaches to restoring your AWS backups.
- You can choose to Restore any of the snapshots listed on the Backups page. To initiate a Restore, select the backup Name and click Restore.
- Alternatively, click the backup Name to view the snapshot details, and then initiate Restore.
To access your backup restores, navigate to Resources, select the appropriate AWS resource type, and then click Restores.
Disaster Recovery
DR Plans
CloudRanger offers enhanced capabilities and custom ADR workflows to streamline disaster recovery planning. Disaster recovery is imperative to recovering business critical AWS cloud data ensuring seamless business continuity minus additional infrastructure expenses.
CloudRanger allows you to define customized DR plans based on the business SLAs and environments, as well as easily clone VPCs and their associated subnets and security groups. With CloudRanger disaster recovery, you can validate RTO and RPO objectives upon actual execution of the recovery process.
To view and manage DR Plans, navigate to Disaster Recovery > DR Plans.
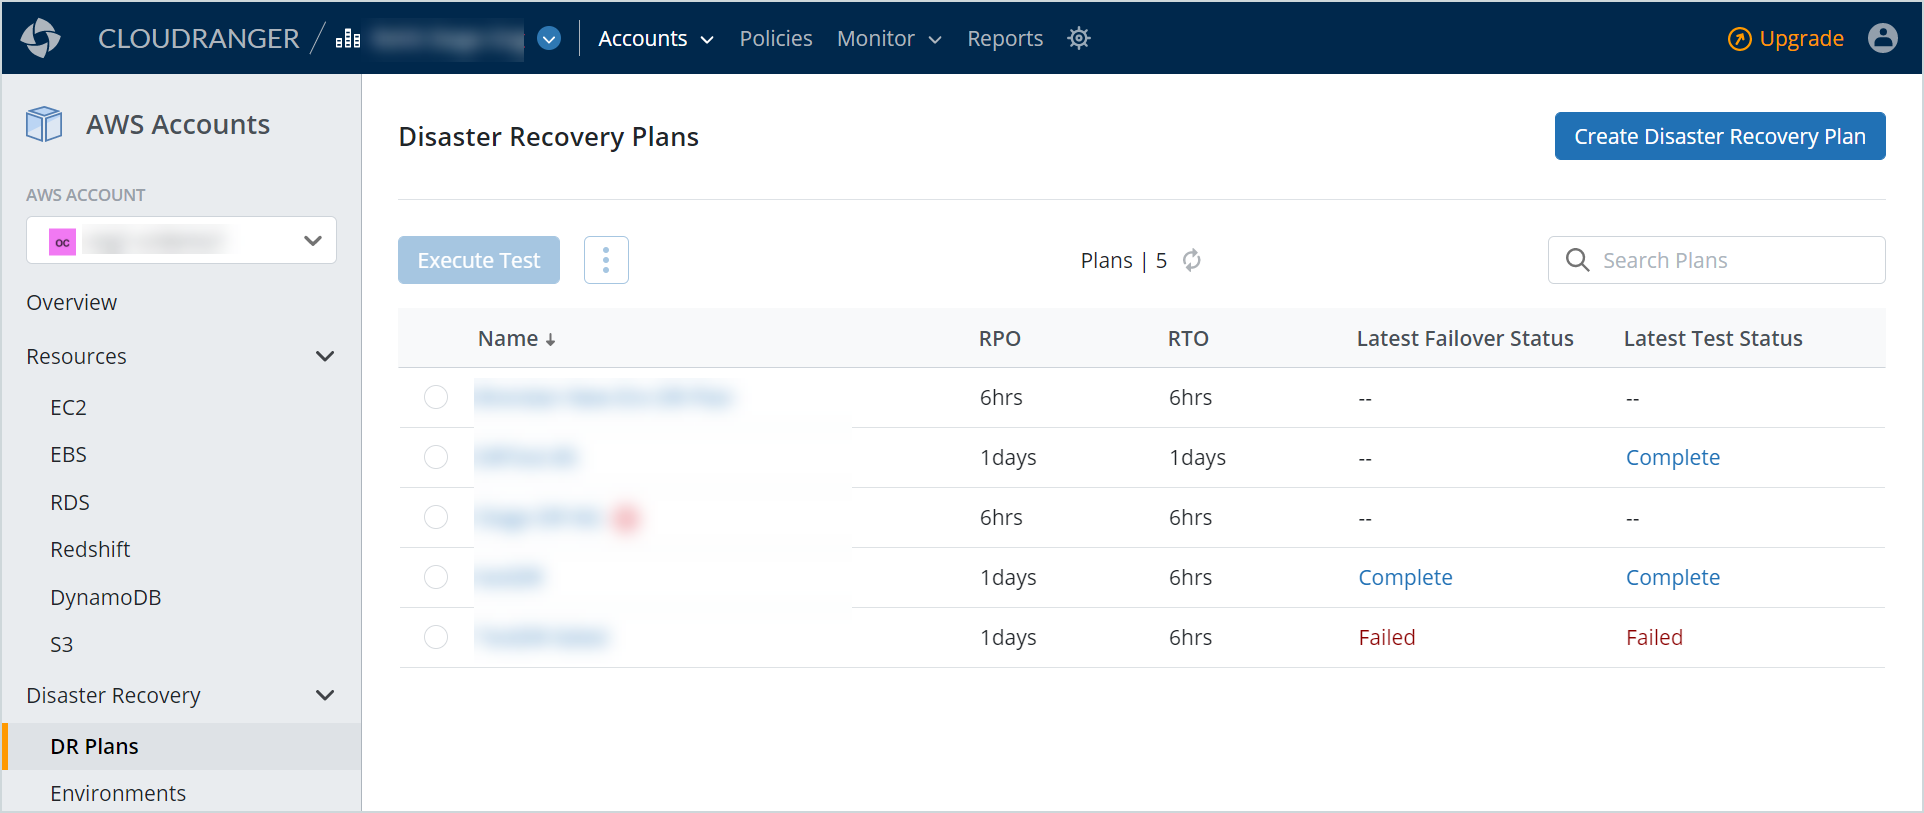
Click Create Disaster Recovery Plan to define a new DR plan.
You may define the following on the Create Disaster Recovery Plan page:
- The appropriate Service Level Objective (SLO) and Service Time Objective (STO) parameters for the DR plan.
- The Source and Target Accounts and Environments.
- The Component Mapping of the Source and Target VPCs.
- The AWS Resources on the Source and Target Environment, as well as the Target Instance Type and the Test Plan Instance Type.
Click on a predefined DR plan Name to view the associated SLOs, the Source and Target Environment details, and Component Mapping of the Source and Target VPCs. You can choose to modify the SLOs, the environment, the resources, or the mapping for that DR plan.
To initiate the DR Plan Testing, select a DR Plan Name and then click Execute Test.
For more information, see Automated Disaster Recovery Workflow.
Environments
Environments allow you to group specific components of your cloud infrastructure and enable you to effortlessly visualize and manage your AWS resources. You can also clone environments as part of a Disaster Recovery plan.
CloudRanger Environments enable you to:
- Identify VPC components and group them into environments
- Manage Automatic Disaster Recovery of resources
- Manage specific VPCs by Subnets or Security Groups
To access your environments, navigate to Disaster Recovery > Environments.
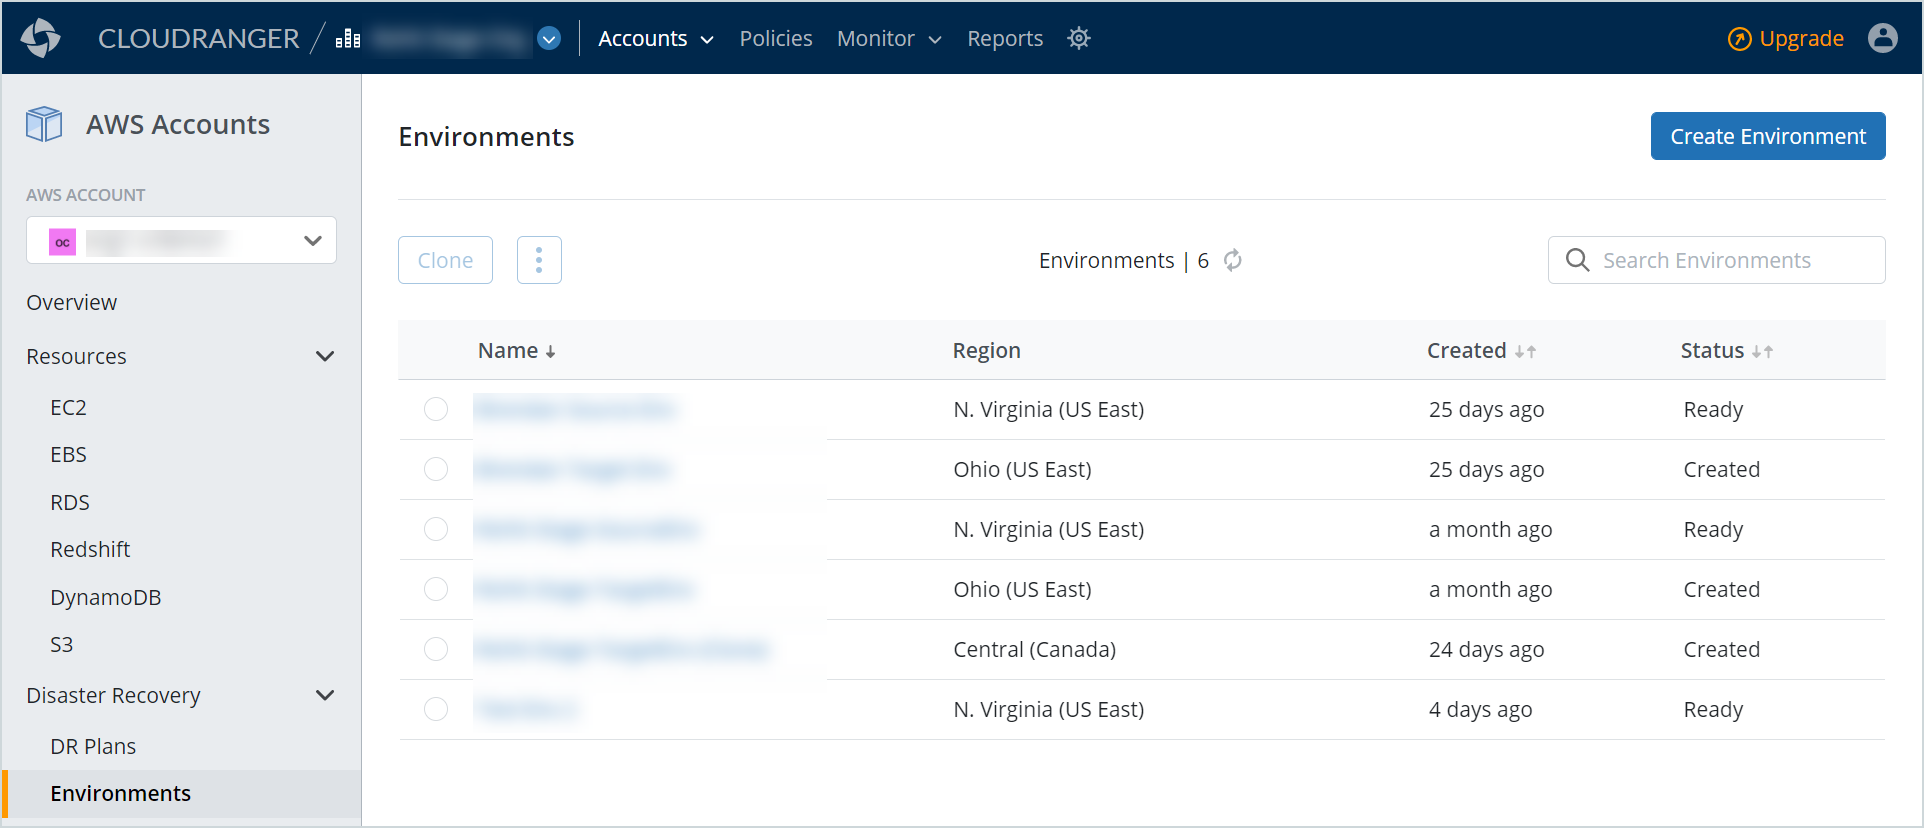
This page displays all Environments defined in CloudRanger, source Region, Created period, and their current Status (for example, Created, Ready, and Clone Failed.).
Click Create Environment to define a new environment within a specific Source Region. This allows you to add specific AWS Resources to that environment.
- You can choose to add multiple VPCs available within the Region and then select the appropriate Subnet, Security groups, and DB Subnet Groups from the drop-down list.
- Click on a predefined environment to view the associated resources and Source Region. You can choose to add or remove resources assigned to that Environment.
- To clone a predefined environment, select the environment Name and click Clone.
Resource Schedules
The Resource Scheduling functionality allows you to optimize your AWS costs by creating an On/Off schedule for your Amazon EC2 and RDS resources.
To view and manage Resources Schedules, navigate to Resources Schedules on the left navigation menu.
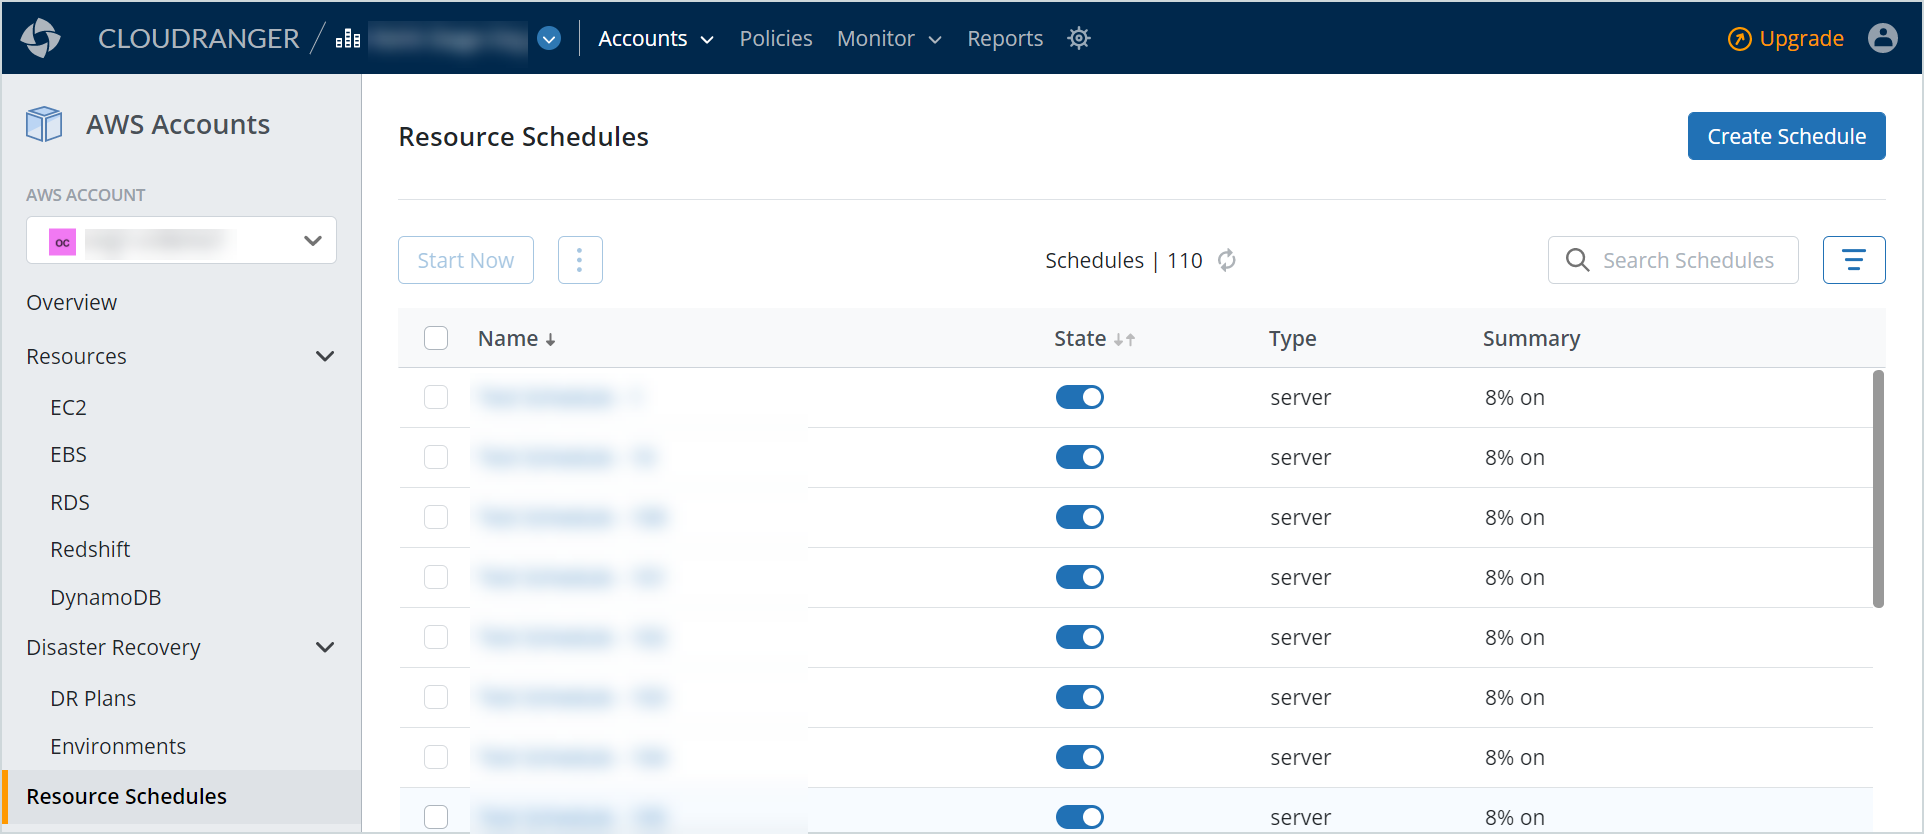
Resources can be scheduled using the ‘On/Off’ schedule or a ‘Reboot’ action specified. Each resource schedule can be applied across specific resources by Instance ID or Instance Tags. Click Create Schedule to define a new schedule for a specific Server or Auto Scaling Group.
To execute a predefined schedule, select the schedule Name and click Start Now. On the Confirm dialog box, click Confirm and Execute.
File Search
Use the CloudRanger File Search feature to locate specific files within your backups using unique meta-data attributes. You may also track changes and download individual files directly from the snapshots.
The File Level Search feature is optional and will need to be enabled from your Account Settings page. File Indexing allows you to define the accuracy of search in backups – a higher frequency of indexing enhances search accuracy, while also impacting costs.
Note: File Level Search feature when enabled will create an S3 Bucket per user account to store the file system metadata of the target backups. The CloudFormation scripts may need to be updated to allow access to the S3 bucket.
To enable File Indexing, click Settings on the left navigation menu and navigate to File Search Settings.
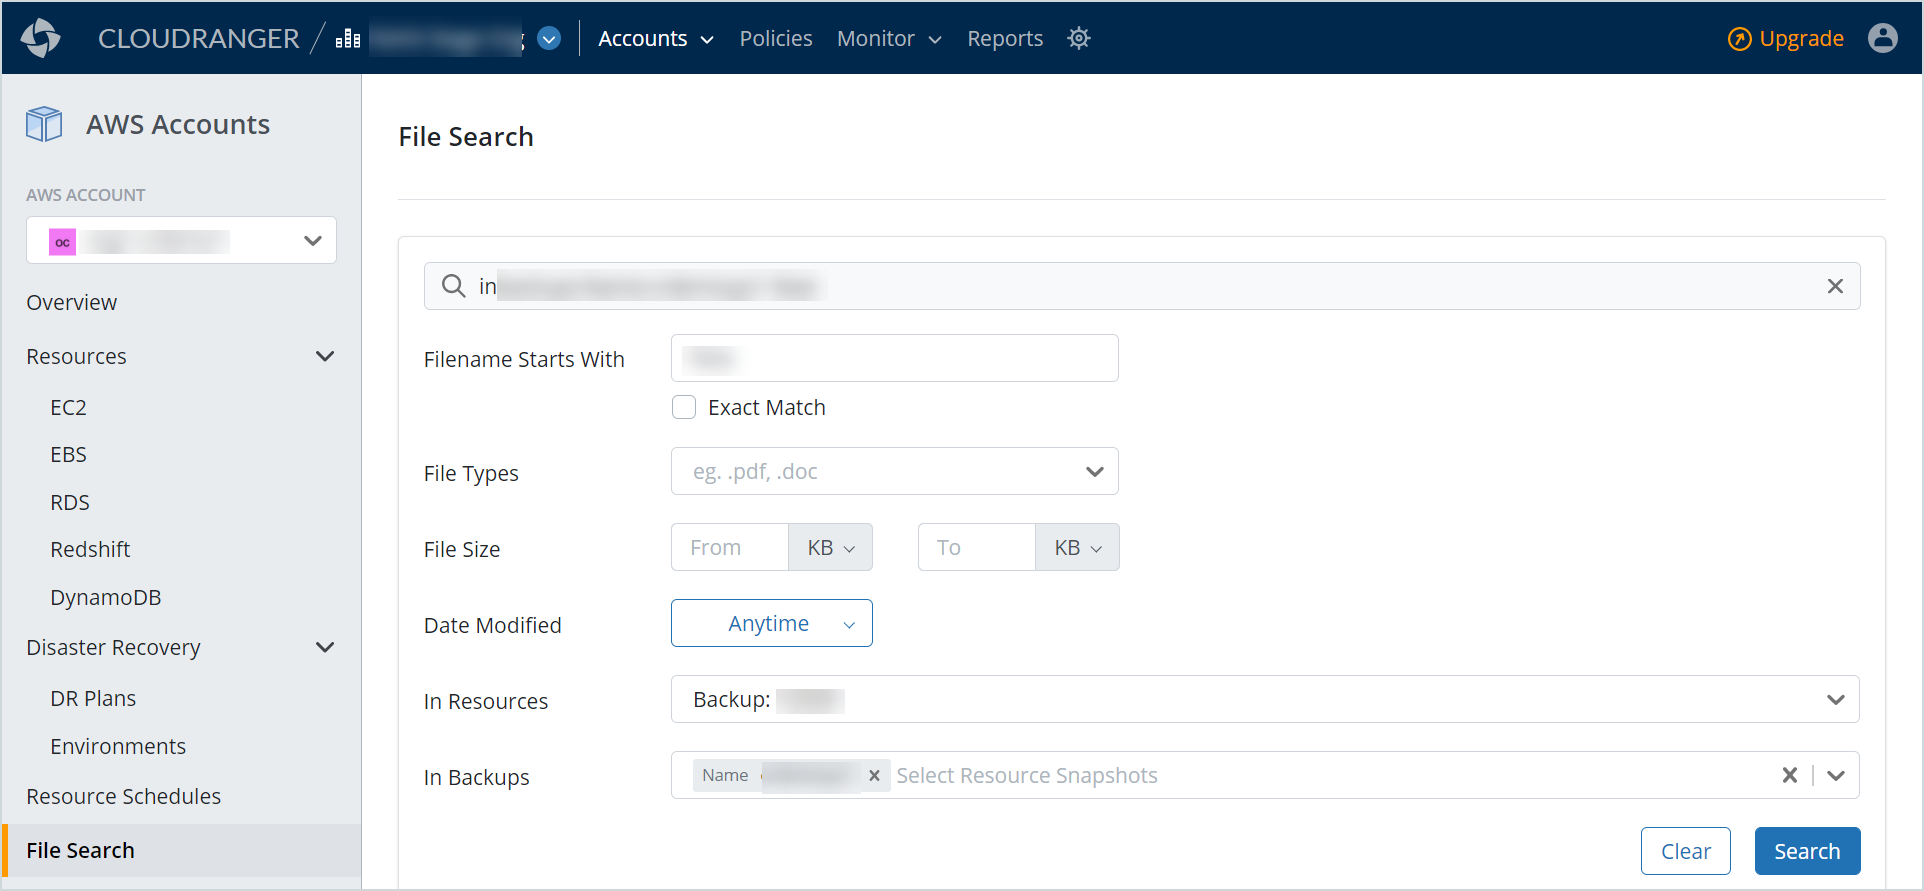
Once file indexing is enabled, you can search files by Name, File Size, Date Modified, as well as files in specific Resources or Backups.
Global administration
Backup Policies
CloudRanger offers a simplified, global approach to backup policies, with options to define one or more policies that can be applied across multiple AWS accounts and instances. The Backup Policies defined can be executed across multiple AWS accounts, and set to Active or disabled depending on business requirements.
Note: The Backup Policies and Retention criteria defined should consider the value of your data, the business requirements, as well as associated legal constraints, before being implemented. Consequently, different types of data may be backed up and retained for different durations across specific regions in keeping with changing business needs.
To access Backup Policies, on the top navigation bar click Policies.
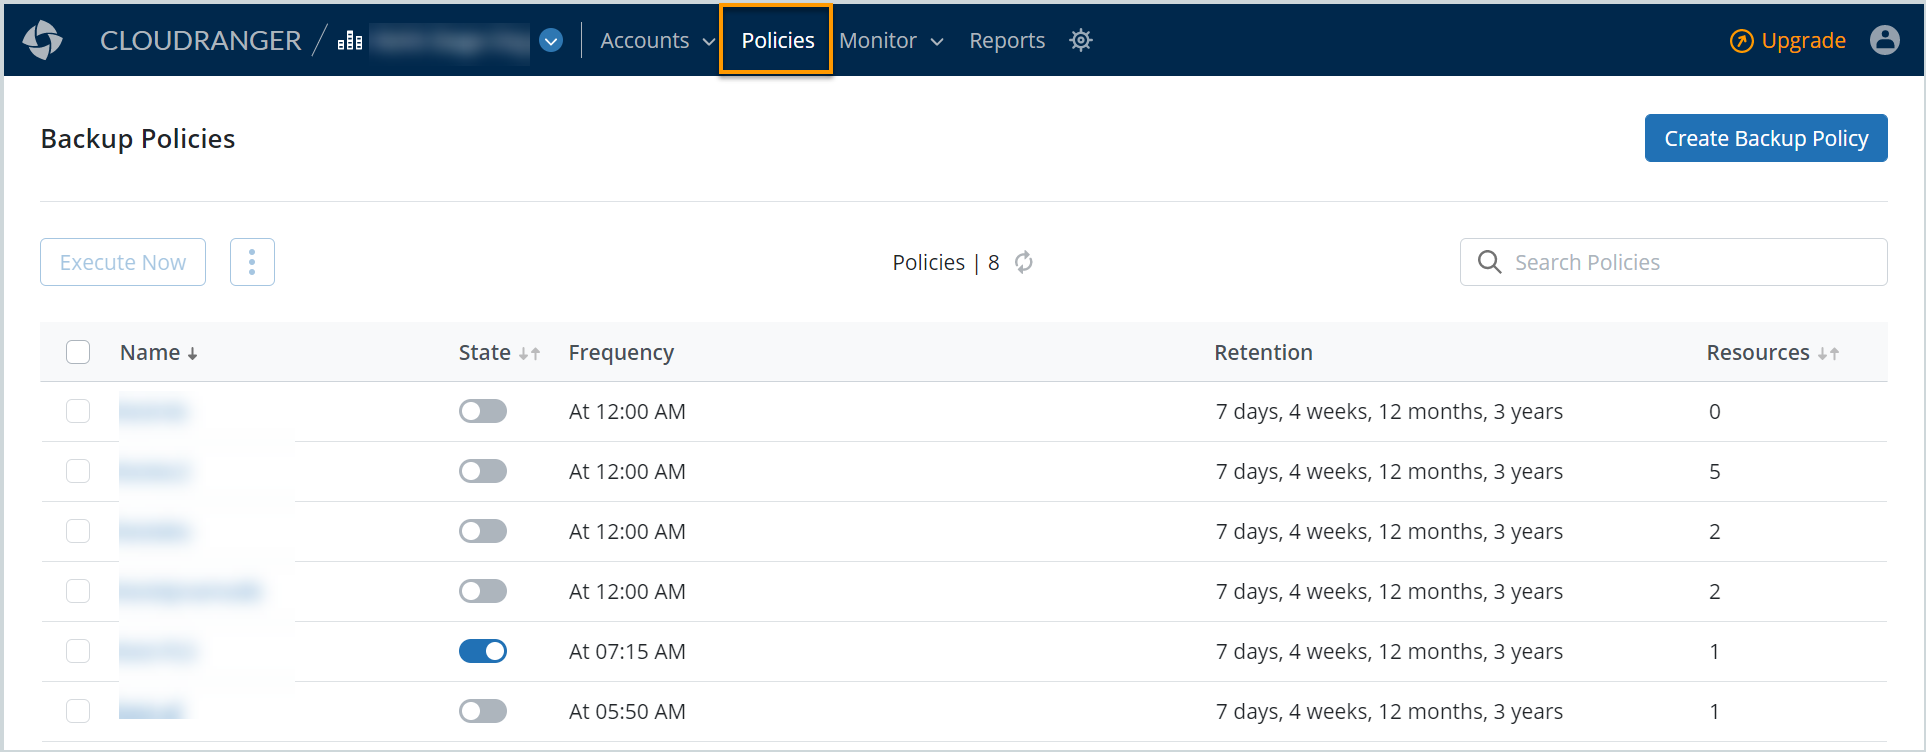
Use CloudRanger Backup Policies to define the backup parameters such as:
- The backup schedule and frequency
- The backup retention plan
- The AWS accounts and resources to be backed up, with options to define inclusions or exclusions
- The number of additional copies to be maintained
- Backup encryption and applicable scripts and tags
- Perform extra tasks such as rebooting the EC2 instance prior to the backup
You can choose to create a unified backup policy for your AWS workloads, while still customizing your global policies to include or exclude instances based on specific Instance IDs, Tags, AWS accounts, Regions, VPCs, or Subnets.
For more information, see Create Backup Policies.
Monitoring
Jobs
CloudRanger provides an integrated view of all scheduled and maintenance activities on the Jobs page. To access Jobs, navigate to Monitor > Jobs.
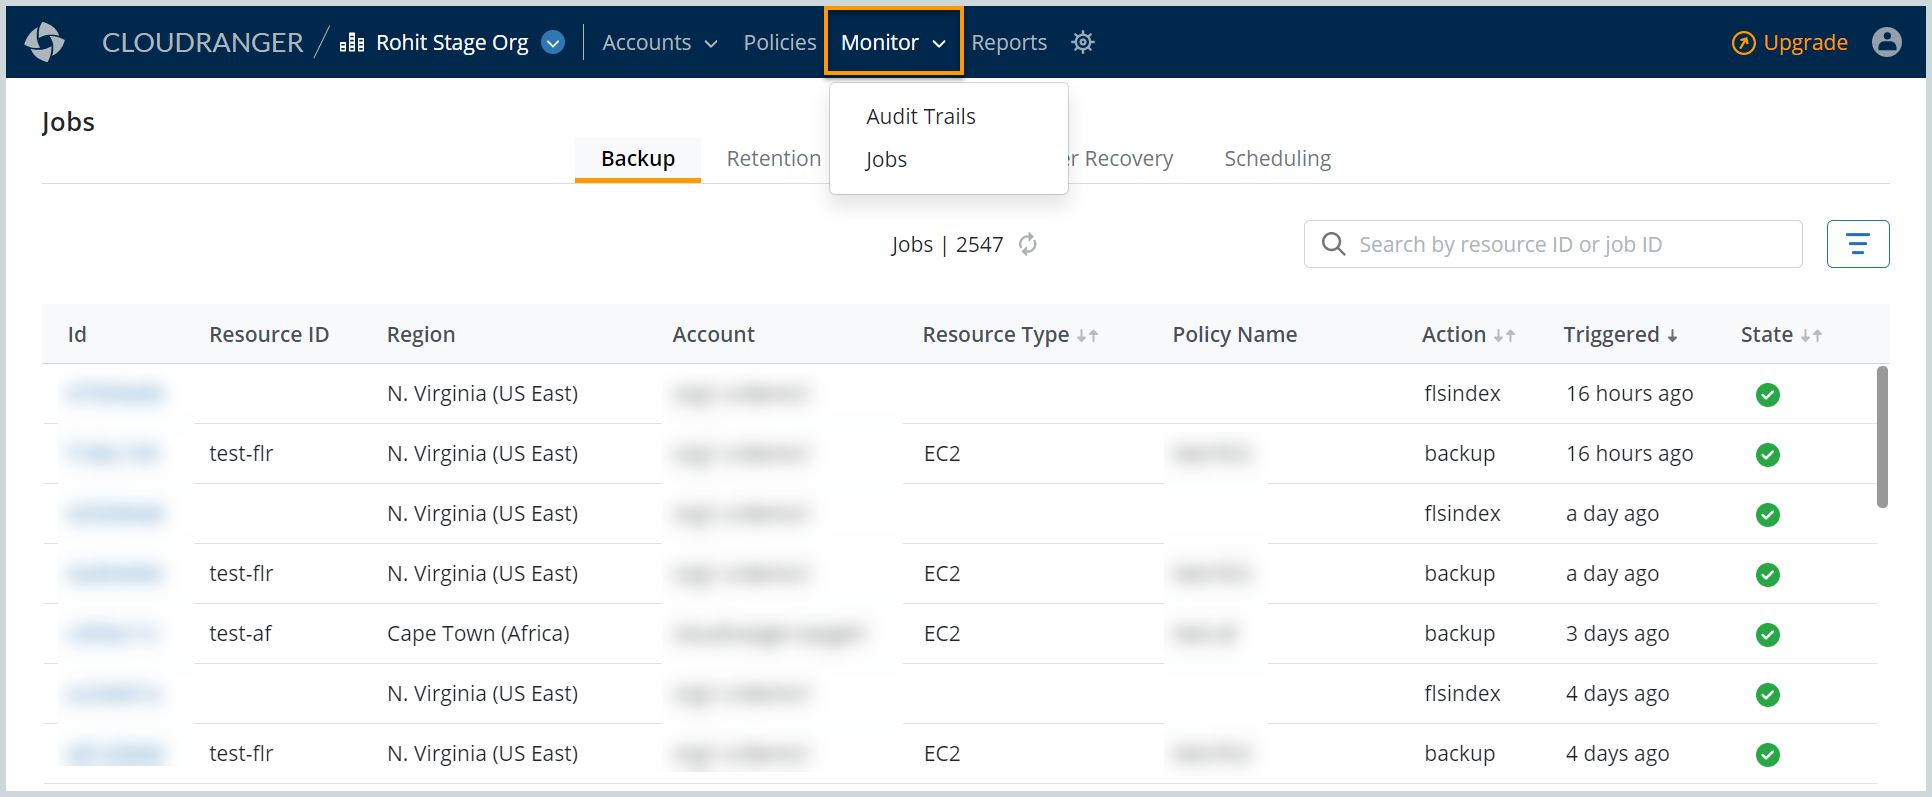
You can access Jobs scheduled or triggered within the following categories:
- Backup
- Retention
- Restore
- Disaster Recovery
- Scheduling
The Job Details page includes detailed information about the selected job, the progress, and associated logs. For more information, see Jobs.
Audit Trails
Audit Trail captures all activities performed by the administrators and users on the CloudRanger console. This is a valuable feature for data governance and ensures that organizations can effectively meet compliance requirements, where needed.
To access Jobs, navigate to Monitor > Audit Trail.
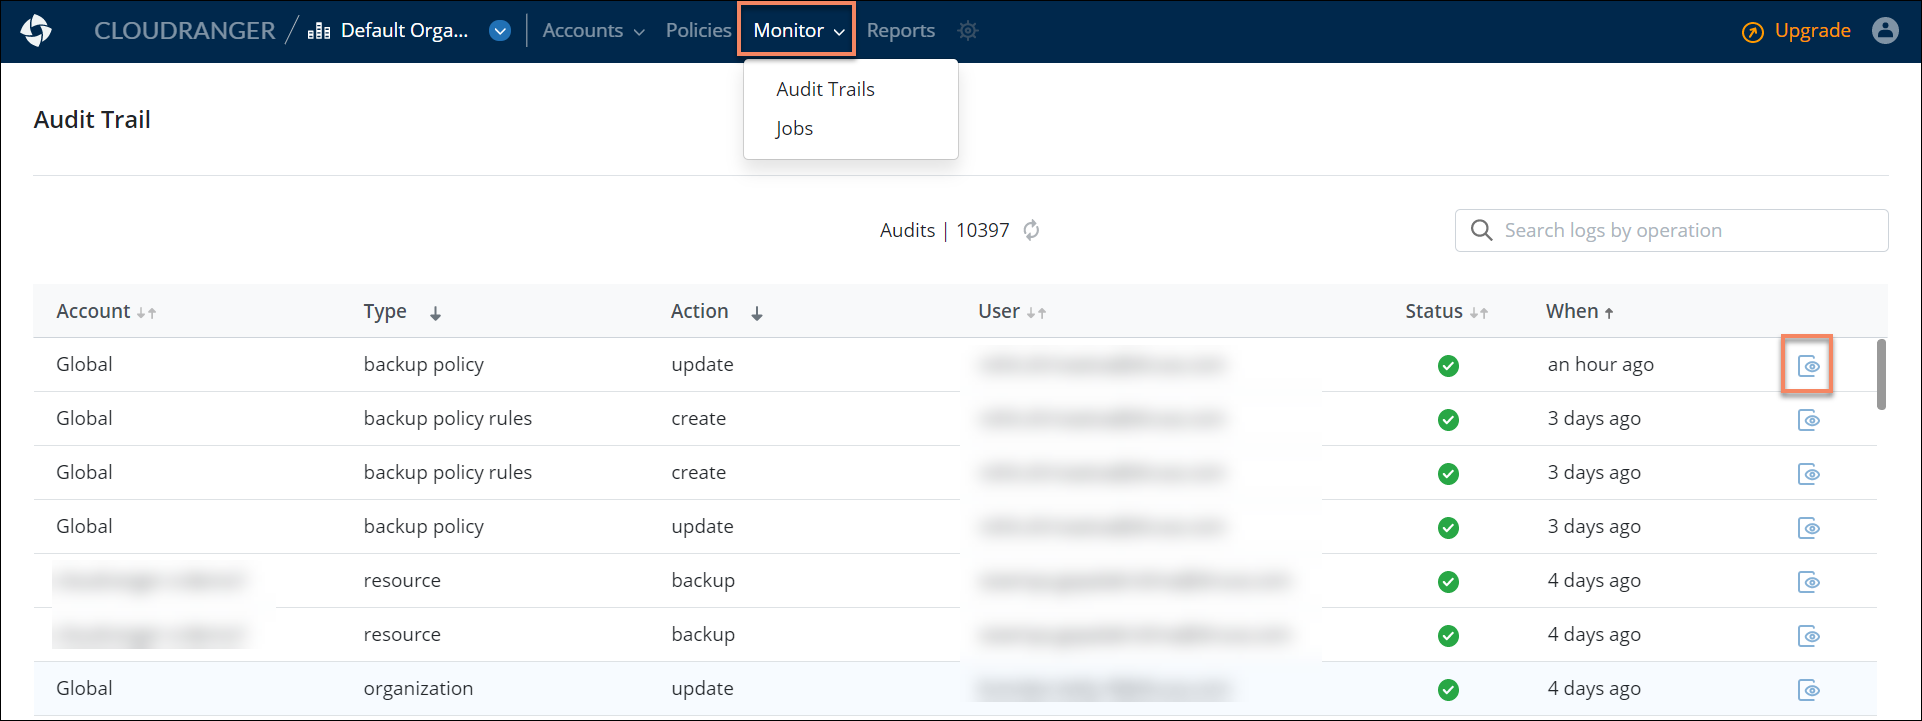
The Audit Trails capture the following user information for ease of tracking and transparency:
- CloudRanger Account
- Type or component modified (for example, backup policy, ADR plan, etc.)
- Action performed
- User information (email ID)
- Status of action performed
- Time of action
For more information, see Audit Trail.
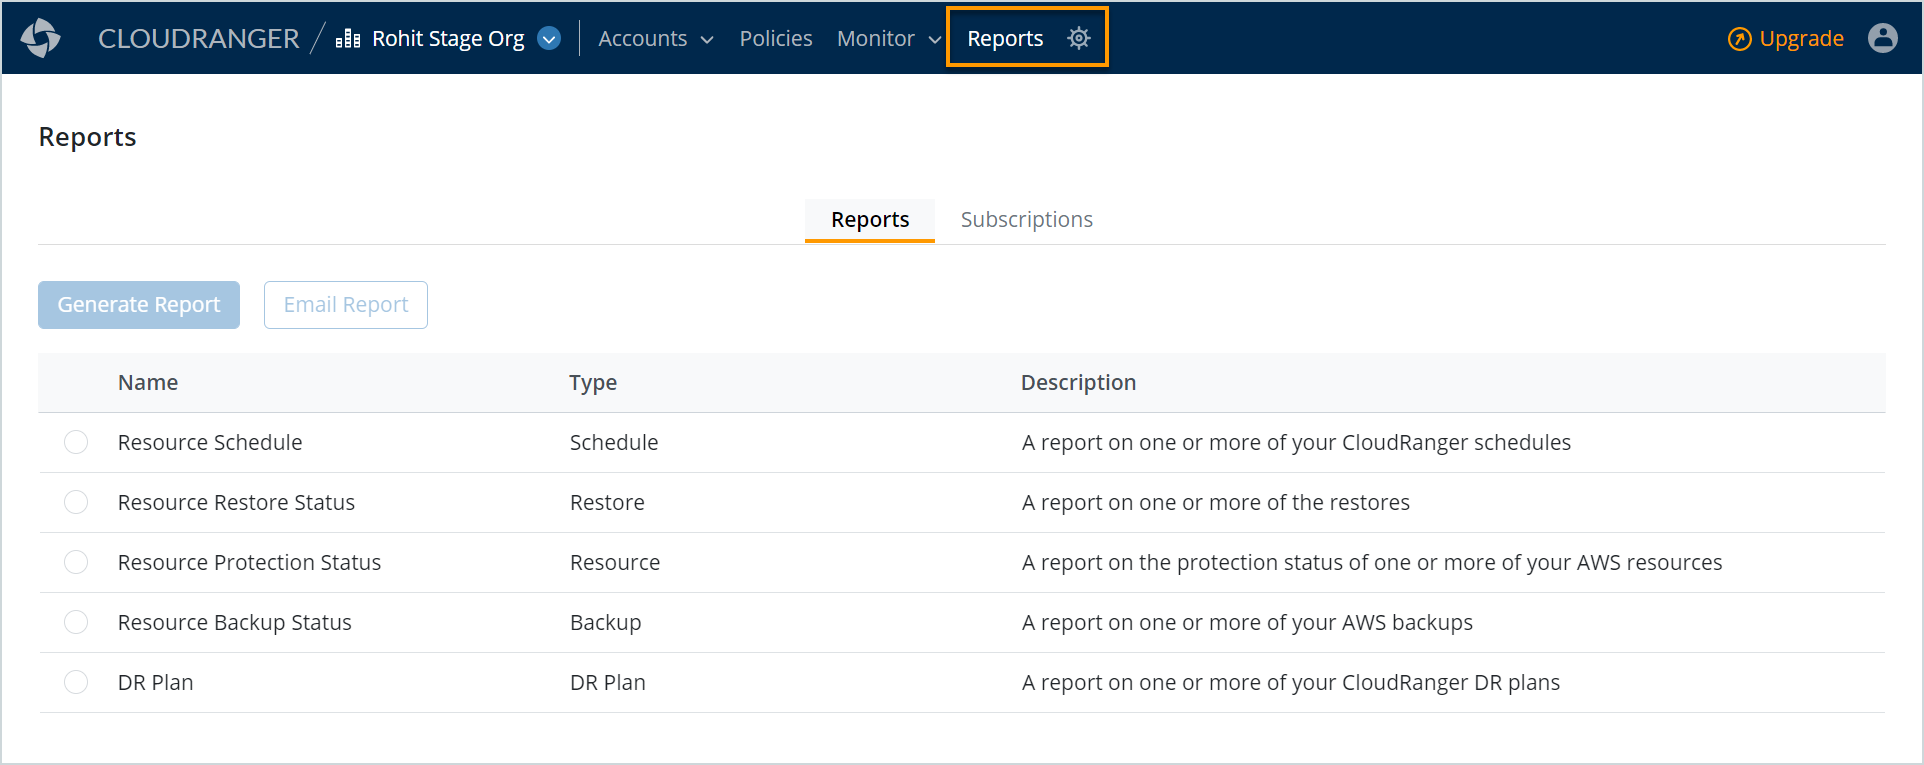
Reports
CloudRanger provides an end-to-end reporting functionality that allows you to generate and customize cross-account Reports on Backup Policies, Schedules, and Disaster Recovery Plans across AWS accounts.
The Reports subscription functionality allows you to generate and manage subscriptions to the following reports:
- Resource Schedule
- Resource Restore Status
- Resource Protection Status
- Resource Backup Status
- Licensing
- DR Plan
To generate and view Reports, on the top navigation bar click Reports.
You can choose to Preview a report directly on CloudRanger or Export it into .pdf or .csv files.
CloudRanger offers a Report subscription functionality that enables administrators to subscribe to specific reports as part of monitoring and compliance. Report subscriptions allow administrators to create and manage email schedules for periodic delivery of specific reports to chosen recipients.
For more information, please see Reports.