Perform File-Level Search for Backups
 Enterprise
 Professional
Overview
Druva CloudRanger’s granular search feature can prove to be invaluable when recovering files that have been accidentally deleted or lost due to migration errors. You can use this functionality to recover files that may have been deleted, or to confirm whether a file exists, as part of compliance and governance.
Note: File Indexing is an optional setting that can be enabled from your Account Settings page. The indexing settings will help define the accuracy of file search within backups. A higher indexing frequency will ensure accurate search results, while also impacting costs.
Before you Begin
The File Level Search feature is optional and will need to be enabled from your Account Settings page.
- Log into your Druva CloudRanger console and navigate to the account on which you wish to enable file search.
- Click the Settings icon on the left navigation menu and navigate to File Level Search Settings to enable File Indexing.
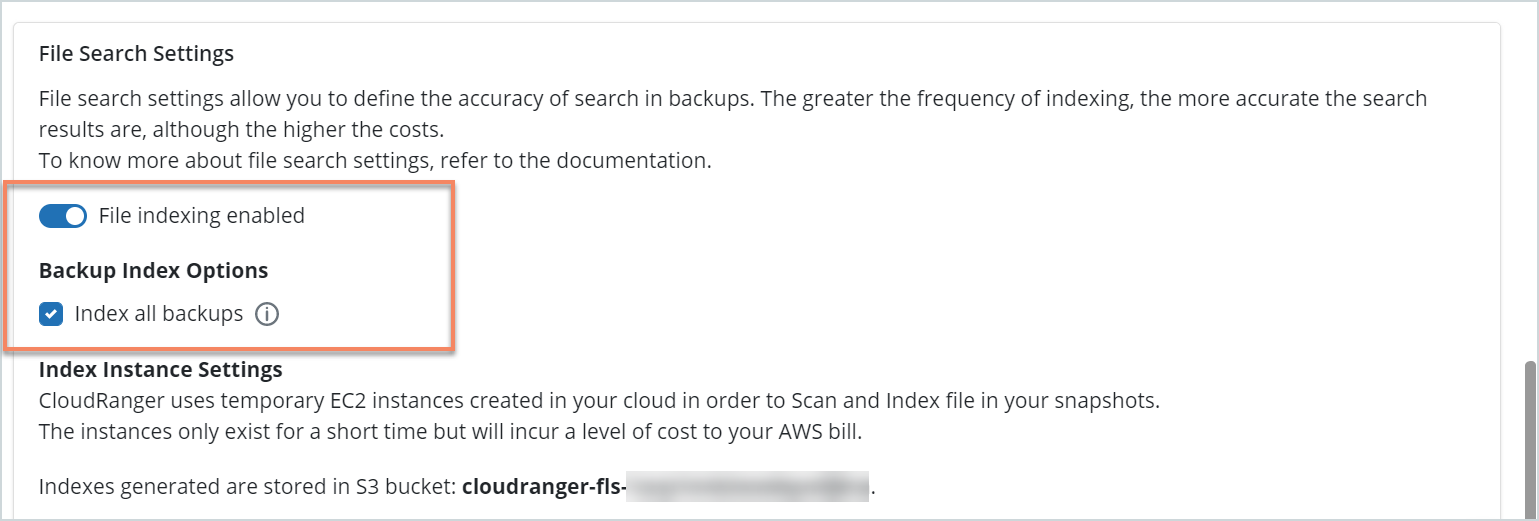
- Enable File Indexing. You may also set the Backup Index Options to Index all backups on Druva CloudRanger.
Note: File Level Search feature when enabled will create an S3 Bucket per user account to store the file system metadata of the target backups. The CloudFormation scripts may need to be updated to allow access to the S3 bucket.
File Level Search and File Level Restore are currently not supported directly from Druva Cloud. You will first have to restore the AMI snapshot and then proceed with File Level Search on the new snapshot.
Perform File Level Search
Step 1: Execute Backup Policy and Index for Search
Once File Search is enabled, you can execute a backup policy and then choose to Index specific backups for File Search.
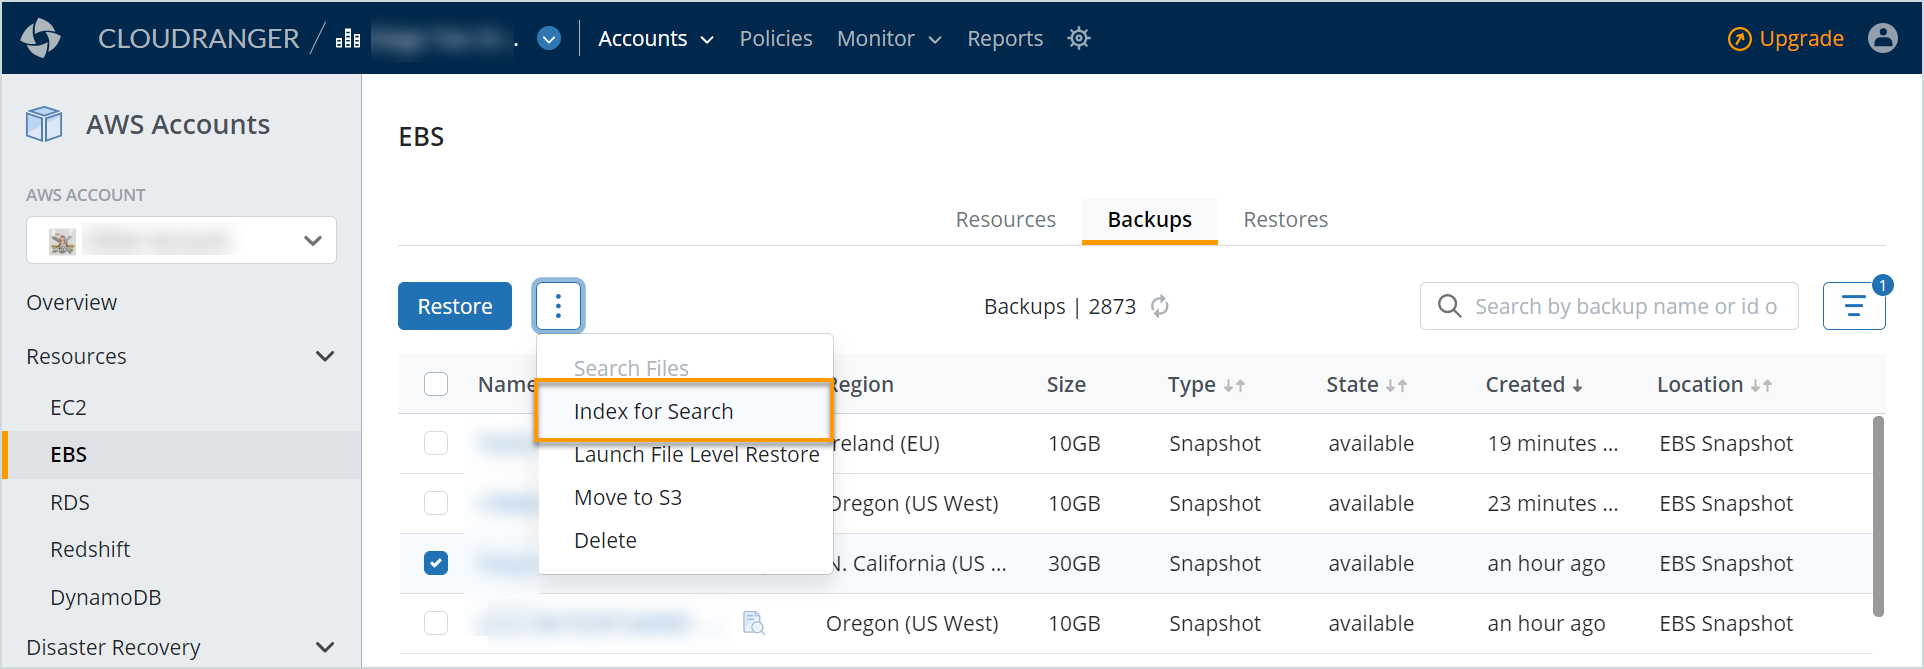
- Log into your Druva CloudRanger console, navigate to Resources and select the Backups tab.
-
Select the backup to be indexed and click Index for search.
Note: The file icon remains grey prior to indexing of a backup. Once the backup is complete and indexed to make it searchable for files, the file icon changes to blue.
- Click the blue file icon to be redirected to the File Search page.
Druva CloudRanger automatically enters the snapshot selected into the In Backups textbox. You can specify other search criteria, as relevant before initiating search.
Step 2: Browsable Indexed Snapshots
- Navigate to File Search from the left navigation menu.
- Specify the search criteria such as File Type, File Size, Date modified, or initiate search within a specific Resource or Backup.
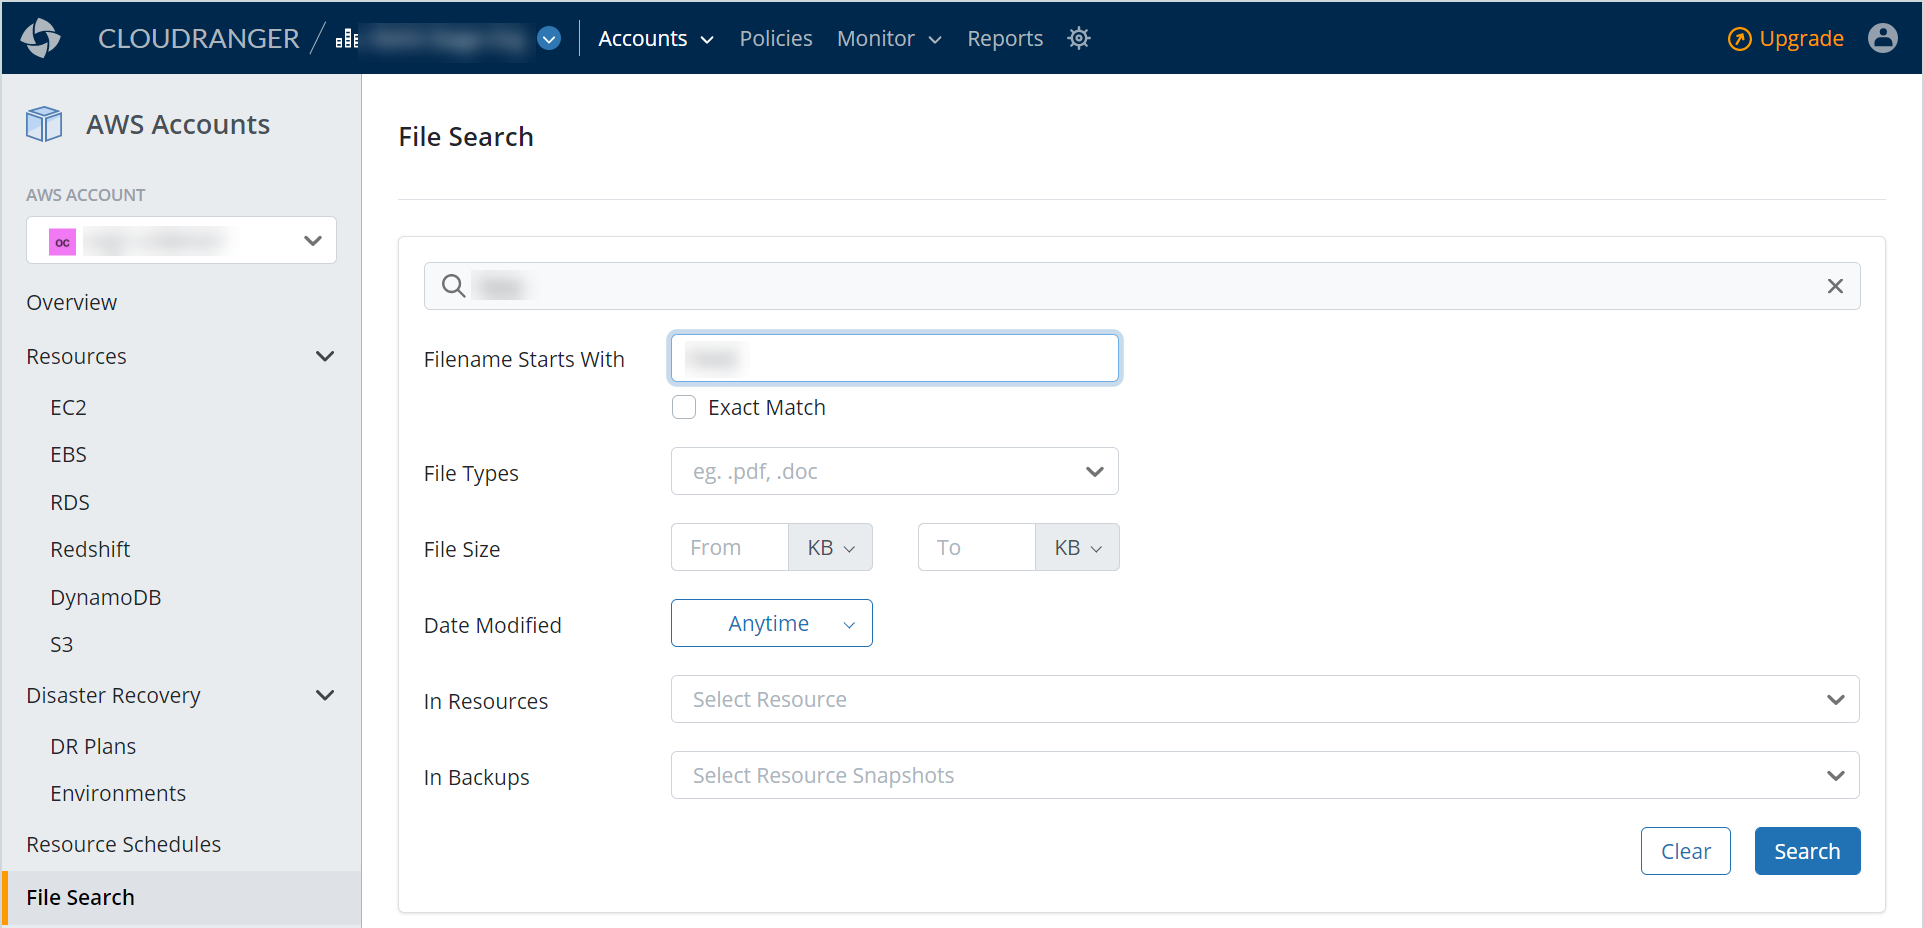
- Click Search.
Step 3: Retrieve File from Search Results
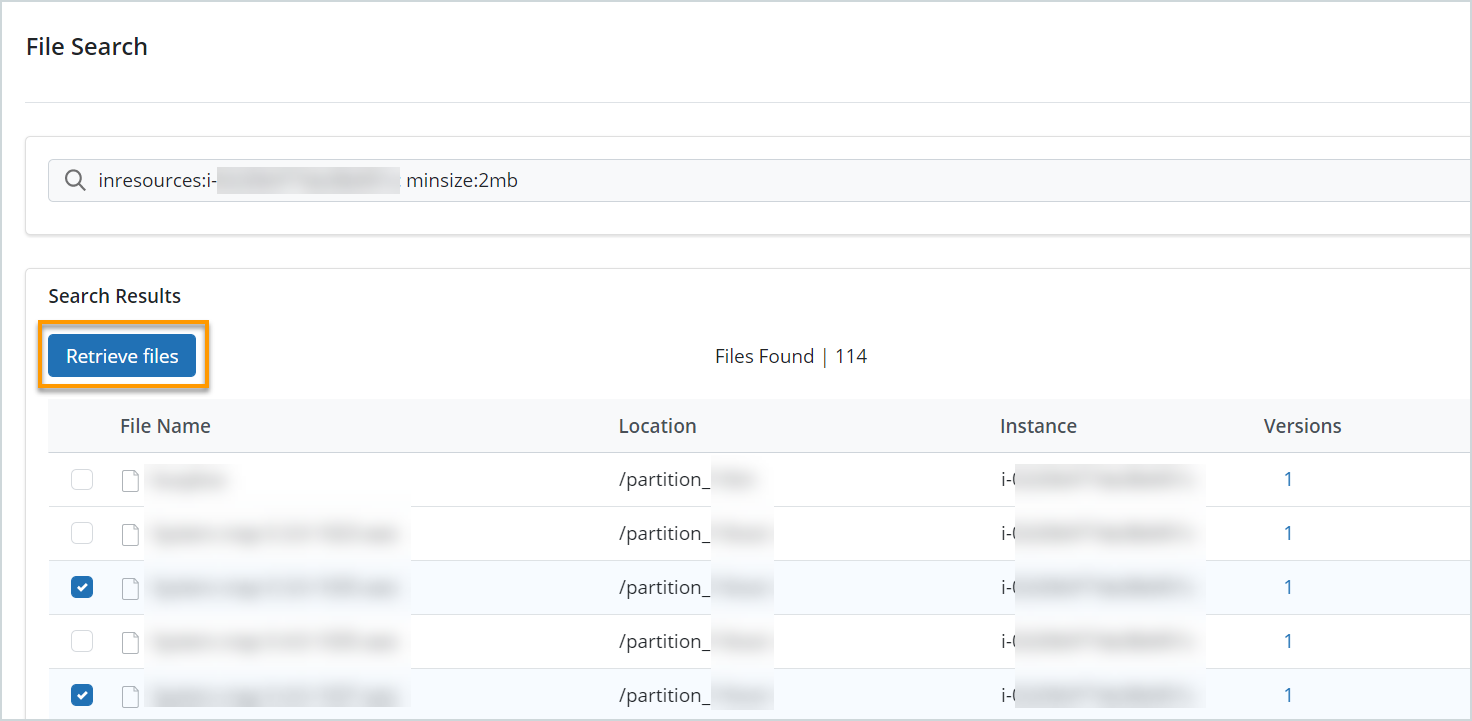
- Once the target file(s) have been identified, the Search Results displays the files within the backup versions that match the criteria specified.
- Select the file and click Retrieve files, and then click Start File Retrieval.
Alternatively, click the link under Versions to download the files.
This initiates the download of the selected file to the user’s desktop.