Restore Archived AMIs
Druva CloudRanger allows you to restore AMIs archived to S3 storage, with options to restore backups across Accounts or Regions.
An Amazon Machine Image (AMI) is a template that contains a software configuration (for example, an operating system, an application server, and applications). From an AMI, you can launch an instance, which is a copy of the AMI running as a virtual server in the cloud. For example, the AMI is an image of your EC2 instance. Once an EC2 instance is backed up, you can choose to restore the AMIs across Accounts or Regions.
To restore an AMI archived to S3 storage:
- Log into your Druva CloudRanger console and navigate to Resources > EC2.
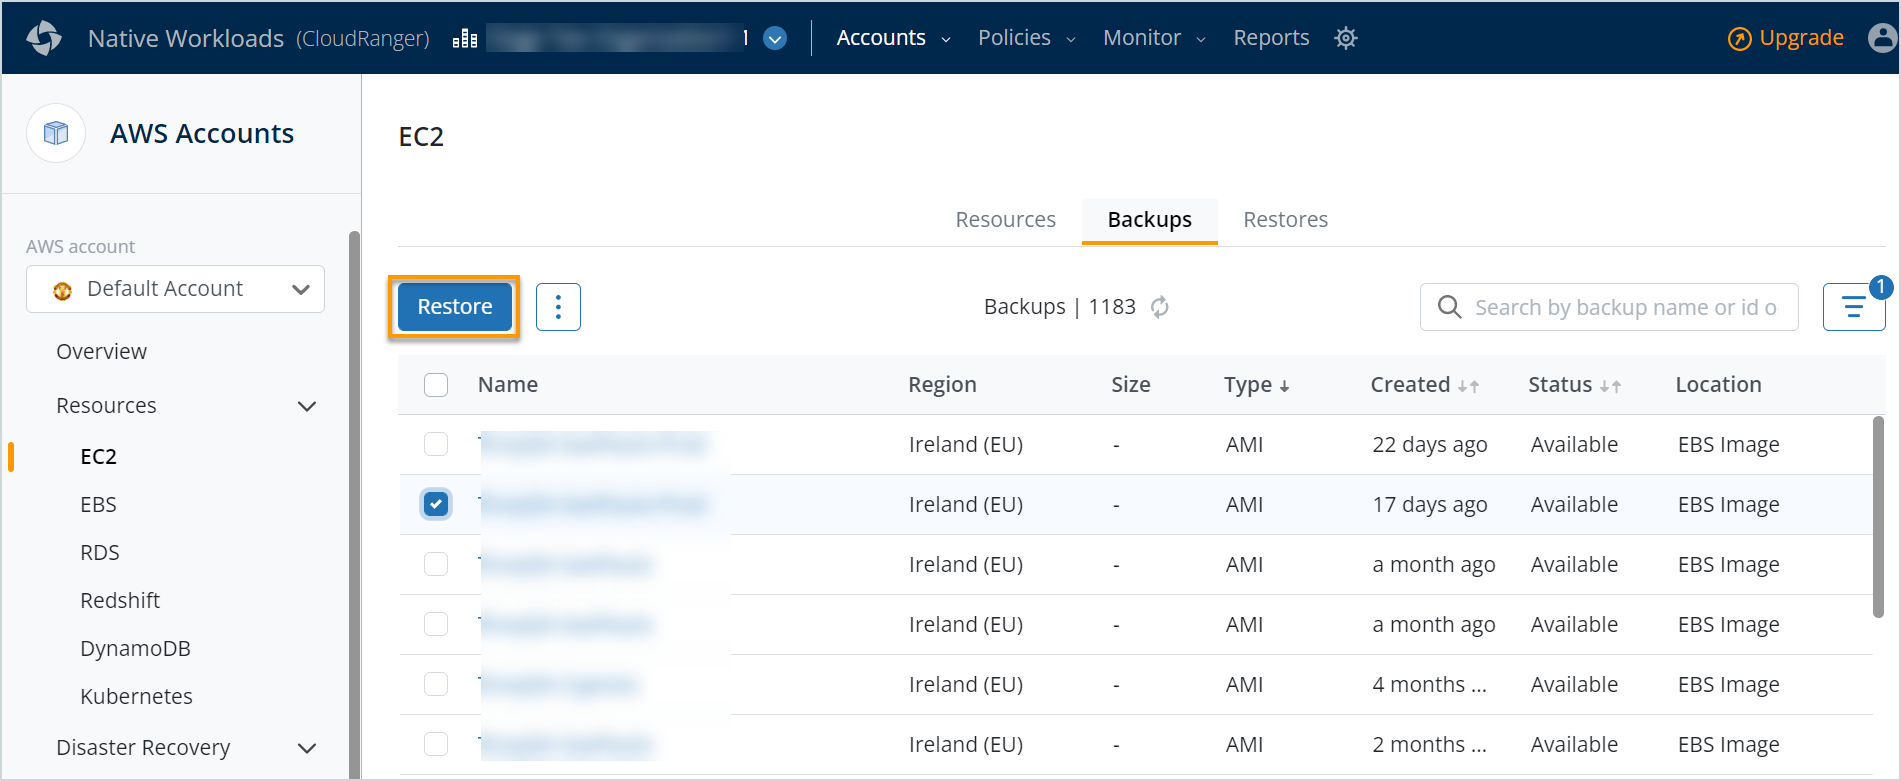
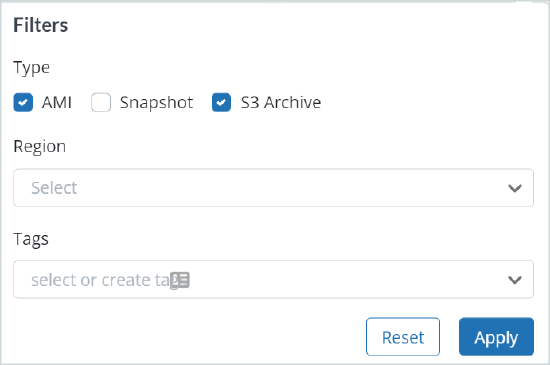
- Navigate to the Backups tab and apply the S3 Archive filter to view archived AMIs.
By default, AMI and S3 Archive are displayed under EC2 Backups.
- Select the archived snapshot that you wish to restore, and then click Restore.
Note: Temporary resources will be required to restore snapshots from S3 Archives, and CloudRanger will trigger a notification before initiating the restore.
4. Click Proceed.
The Restore Snapshot page displays an overview of the snapshot with the associated tags.
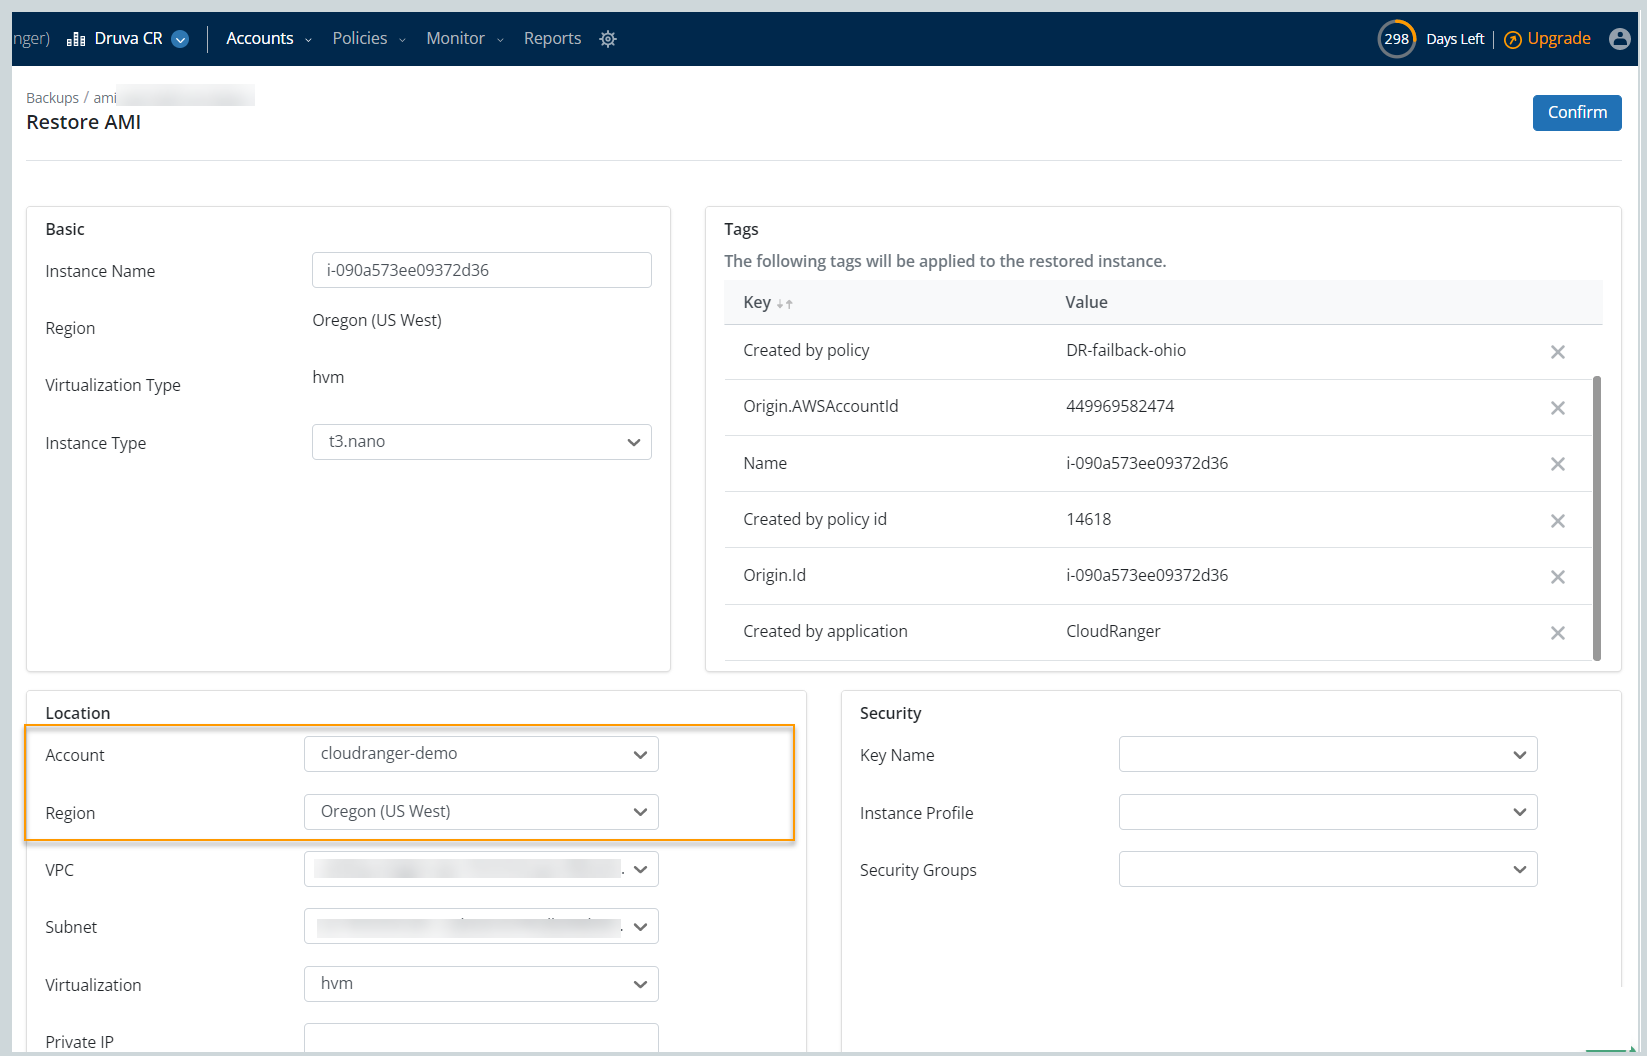
You can choose to modify the following settings, as applicable:
|
Field |
Description |
|
Instance Name |
By default, Druva CloudRanger displays the name of the original EC2 instance, and if unavailable, the instance ID is used as the name. You can choose to modify the default instance name. |
|
Region |
The AWS Region where the backed-up AMI is stored. |
|
Availability Zone |
Choose an availability zone within the region where the AMI is stored. |
|
Instance Type |
Choose an instance type of the restored EC2 instance. By default, Druva CloudRanger selects the original EC2 instance type.
For more information, refer to the AWS documentation. |
|
Tags |
|
|
Key |
This section displays the tag keys that have been specified for the source EC2 instance or the AMI. |
|
Value |
The Value will depend on the Key specified. |
|
Location |
|
| Account | Select the Druva CloudRanger Account to which the AMI is to be restored. |
| Region | Select the AWS Region to which the AMI is to be restored. |
|
VPC |
Select a virtual private cloud (VPC) where you want the restored EC2 instance to run. |
|
Virtualization |
Select the virtualization type for the restored EC2 instance. |
|
Private IP |
Specify the private IP address of the EC2 instance that will be attached to it upon restore. The IP address provided must be within the range of IP addresses for the Subnet specified previously. |
|
Security |
|
|
Key Name |
The backup encryption target key for the EC2 instance. |
|
Instance Profile |
Choose an instance profile for the restored EC2 instance. |
|
Security Groups |
Select a security group for the restored EC2 instance. |
|
Block Device Mappings |
This section displays information on the AMI to be restored:
|
5. Click Confirm.
The restored AMIs will now be available on the Restores page.