Restore Archived Snapshots to an Instance
Druva CloudRanger allows you to restore snapshots archived to S3 storage to an instance, with options to restore backups across Accounts or Regions.
Before you begin
Before you can restore archived snapshots to an instance, you will need to update your AWS Access Role by deploying the latest CloudFormation template for each account in which you intend to restore snapshots. Navigate to Account Settings > AWS Access, and update your AWS CloudFormation stack/stackset.
For more information, see Update Existing AWS Access Roles in Druva CloudRanger.
Known Limitations to Restoring Snapshots on Windows
A potential limitation when restoring archived snapshots originating from a Windows environment is the MBR/UEFI-based boot partition, which defaults to a Linux boot partition. The restore job proceeds to the final step, where the boot attempt fails, although the data is restored to snapshots and available in AWS.
Perform the steps outlined below once the restore is complete (when the boot attempt fails):
- Gather the Snapshot IDs that have been restored from S3, and the block device mapping on the backup (for example, snap-xxx corresponding to mapping /dev/sda1).
- From each snapshot that was restored from S3, create a volume.
- Use the Image ID of the original instance to launch a new instance.
- You may customize your instance settings as needed.
- Once the instance is in a running state, stop the instance.
- When the instance is in the stopped state, detach each volume, and reattach the volume created from the snapshots restored.
- Start the instance, and once running, you may use the password for the original instance to access the data.
Restoring Archived Snapshots as an Instance
To restore an archived snapshot to an instance:
- Log into your Druva CloudRanger console and navigate to Resources > EBS.
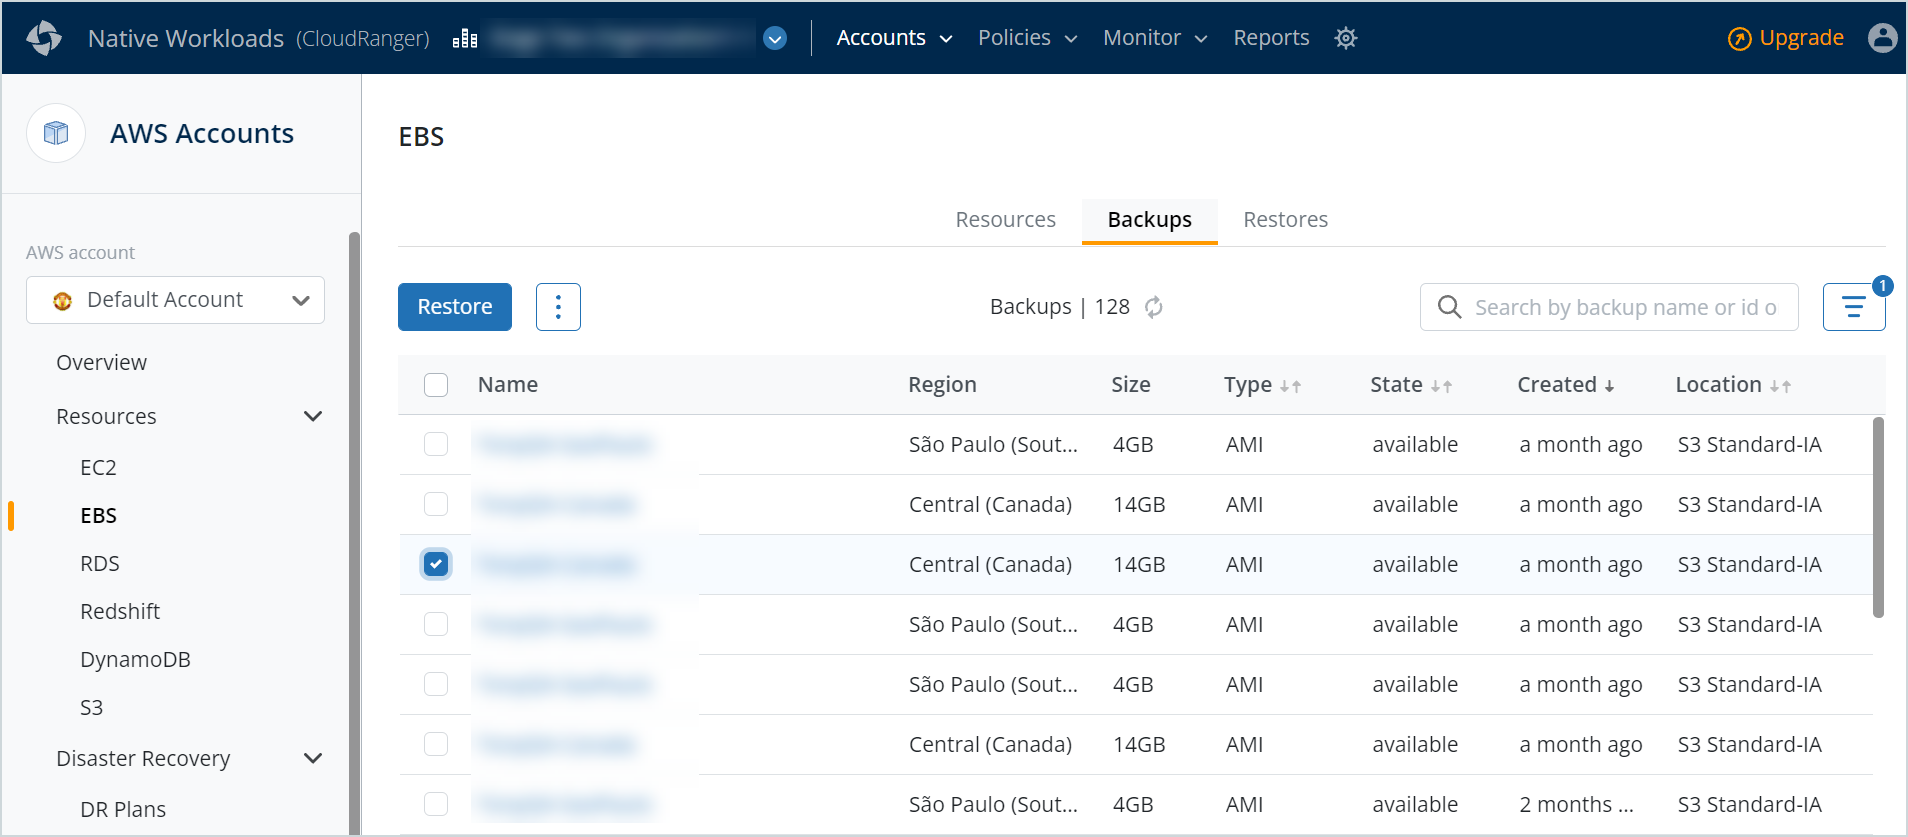
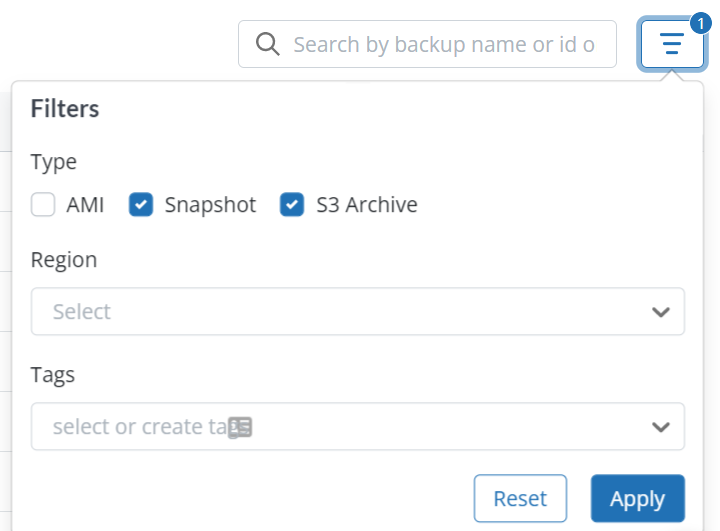
- Navigate to the Backups tab and apply the S3 Archive filter to view archived snapshots.
By default, Snapshots and S3 Archive are displayed under EBS Backups.
-
Select the archived snapshot that you wish to restore, and then click Restore.
Note: Temporary resources will be required to restore snapshots from S3 Archives, and CloudRanger will trigger a notification before initiating the restore.
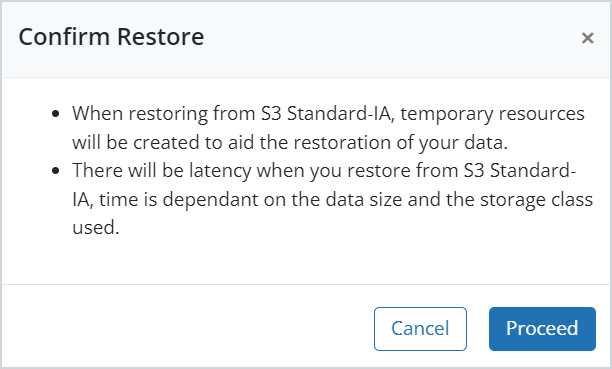
4. Click Proceed.
The Restore Snapshot page displays an overview of the snapshot with the associated tags.
5. Select the Restore as an instance option.
Note: When restoring a snapshot from S3 Archive, the File level recovery option will remain disabled. This feature will be supported as part of upcoming enhancements.
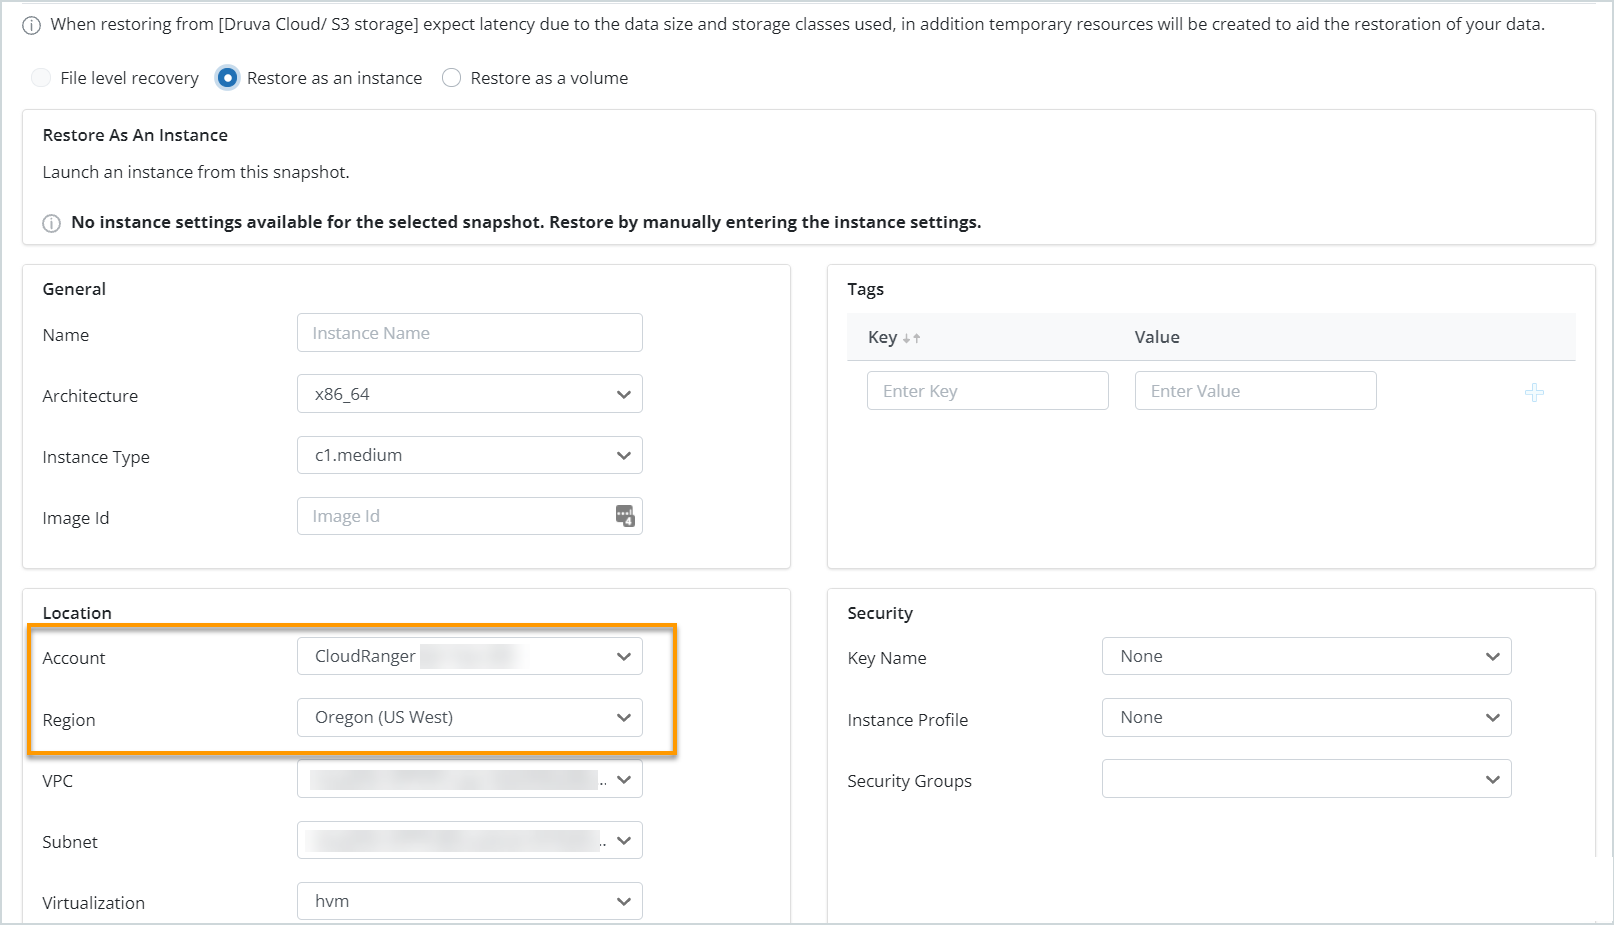
You can choose to modify the following settings, as applicable:
| Field | Description |
|
General |
|
|
Name |
By default, Druva CloudRanger displays the name of the original EC2 instance, and if unavailable, the instance ID is used as the name. |
|
Architecture |
Select the processor architecture for the instance, for example, i386. |
|
Instance Type |
Select an instance type of the restored EC2 instance. By default, Druva CloudRanger selects the original EC2 instance type. Note: Not all instance types are supported in all regions. If you run into issues with the restore, verify that the selected instances are supported for that region. For more information, refer to the AWS documentation. |
|
Image ID |
The ID of the associated AMI. |
|
Tags |
|
|
Key |
This section displays the tag keys that have been specified for the source EC2 instance or the AMI. |
|
Value |
The Value will depend on the Key specified. |
|
Location |
|
|
Account |
Select the Druva CloudRanger Account to which the archived snapshot is to be restored. |
|
Region |
Select the AWS Region to which the archived snapshot is to be restored. Note: Druva CloudRanger now supports cross-account and cross-region restores when restoring snapshots as an instance. |
|
VPC |
A virtual private cloud (VPC) where you want the restored EC2 instance to run. |
|
Subnet |
Subnet of the VPC where you want the restored EC2 instance to run. |
|
Virtualization |
Virtualization type for the restored EC2 instance. |
|
Security |
|
|
Key Name |
The backup encryption target key for the EC2 instance. |
|
Instance Profile |
Instance profile for the restored EC2 instance. |
|
Security Groups |
Security group for the restored EC2 instance. |
|
Block Device Mappings |
The Device Name, Snapshot ID, Account and AWS Region to which the instance is to be restored. |
 icon to remove a device mapping.
6. Click Confirm.
The restored snapshots will now be available on the Restores page.