Add folders
Overview
The folders from where the inSync Client backs up data are called backup folders. Your administrator can allow you to add folders for backup.
Note: The administrator can restrict backing up of certain folders to comply with security regulations. If you try to add a folder that is restricted for backup, "The folder has been excluded from backup by your IT administrator" message is displayed. For more information on folders that are excluded from backup by the administrator, see View Global Exclusions list.
Important considerations for inSync Client 6.5.0 installed on macOS Mojave (version 10.14) or later:
The macOS will display an authorization prompt when inSync Client tries to access the prompting locations if configured for backup. Click OK to allow inSync to back up the data.
Prompting Locations:
-
Location Services
-
Contacts ~/Library/Application Support/Address Book
-
Calendars ~/Library/Calendars
-
Reminders ~/Library/Calendars
-
Photos ~/Pictures/Photos Library.photoslibrary
-
Desktop ~/Users/User Name/Desktop
-
Documents ~/Users/User Name/Documents
-
Downloads ~/users/User Name/Downloads
If inSync Client users do not take any action on the prompts, inSync will pause the ongoing backup and it will remain in that state until the user takes an action.
inSync may display an authorization prompt if inSync does not have the required access permissions.
If inSync displays the authorization prompt to access the locations for backup, it is recommended to grant inSync the required access permission. Click Open Security & Privacy and complete the following steps:
- Click the Privacy tab.
- Click Full Disk Access on the left pane.
- Click the + button.
- Click Applications on the left pane.
- Select inSync from the list of applications.
- A prompt is displayed to apply the modified settings. Perform the following steps:
- Select Quit Now.
- Go to Launchpad and start the inSync Client.
To add folders for backup
- Start the inSync Client.
- In the navigation pane, click Backup & Restore.
- In the right pane, click Add folder. The Add Folder window appears.
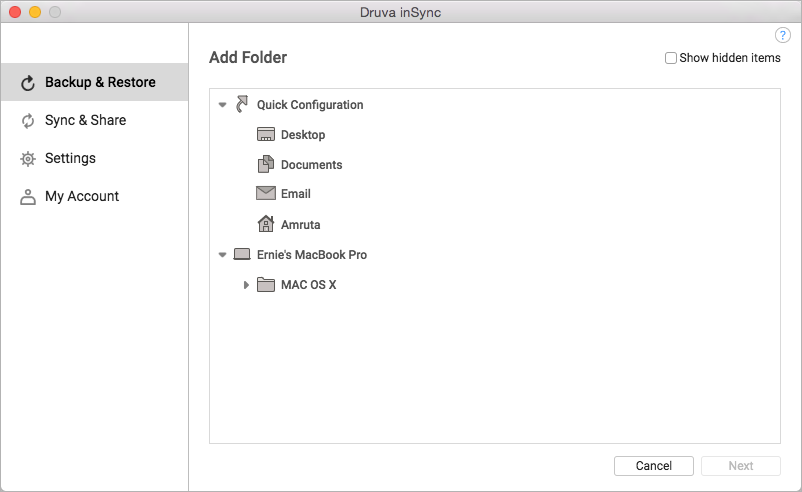
- Select the Show hidden items checkbox located at the top-right corner of the Add folder window. Selecting this check box enables you to view hidden files and folders in the folders that you navigate and select for back up.
- Under Quick Configuration or My Computer, navigate and click the folder that you want to back up and then click Next.
- If the parent folder is checked, all the files and folders inside that directory will be included for backup.
-
If you want to backup only certain files and folders within a parent folder then, clear the parent folder check box and select only required files and folders that you want to include for backup.
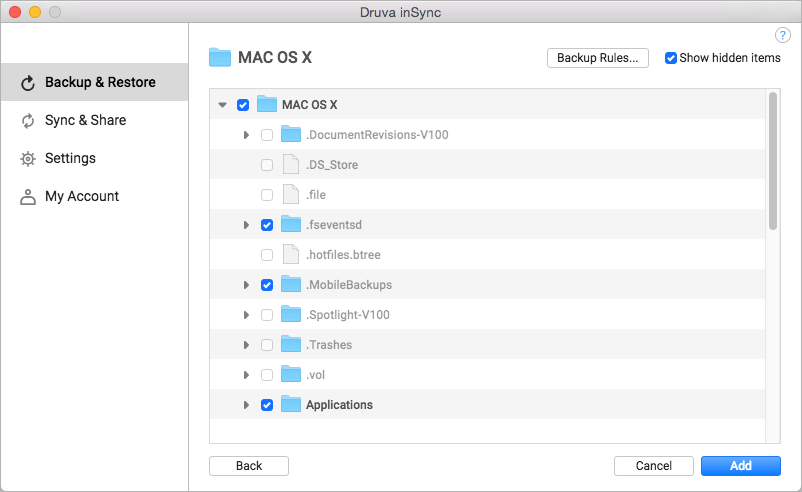
- Select the files or folders that you want to back up. When you select a folder for backup, all files and folders, including the hidden files and folders, are selected for backup. You can explicitly remove the files and folders that you want to exclude from backup by clearing the adjacent check box.
- inSync Client does not backup OneDrive mapped folder on user devices. If you have configured a OneDrive mapped folder to be backed up, inSync Client will skip the folder during backup.
- On MAC Client, if you configure a folder for backup, which has a SYMLINK folder within, then the folder contents of the SYMLINK folder will not be displayed.
But, if you configure a folder which is a SYMLINK folder, then all the contents within the SYMLINK folder are displayed.
- Click Add.
Configure backup settings of the selected folder
You can change the configuration settings of the folders that you configure for backup. By default, all files from a selected folder are backed up. You can include or exclude some files or file types from backup.
Note: You cannot change the configuration settings of the folders that your administrator has included in the backup.
To configure backup settings
- Start the inSync Client.
- In the navigation pane, click Backup & Restore.
- In the right pane, click Add folder. The Add Folder window appears.
- Under Quick Configuration or My Computer, navigate and click the folder that you want to back up and then click Next.
- Click Backup Rules... for the backup folder that you want to configure.
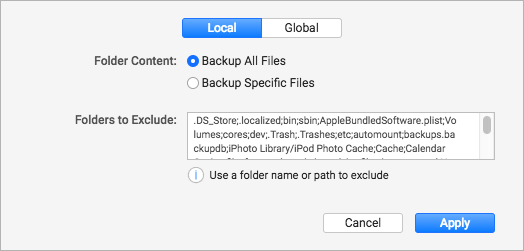
- Under Local > Folder Content, if you want to backup all the files select the Backup All Files option.
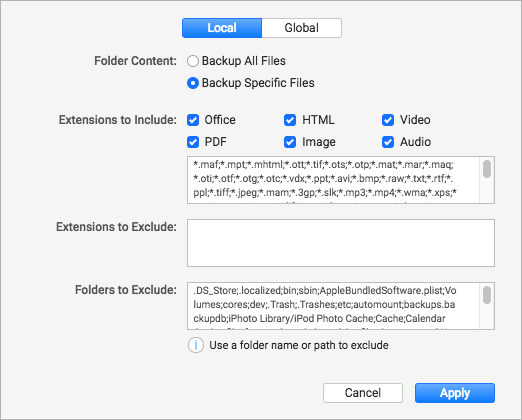
If you want to include only specific files for backup, click Backup Specific Files and select the required file filters.
- Provide the appropriate information for each field.
Field Action Extensions to Include Type the file types that you want to back up. Ensure that you separate consecutive entries using a semicolon (;) and there is no white space between two entries. Extensions to Exclude Type the file types that you want to exclude from the backup. Ensure that you separate consecutive entries using a semicolon (;) and there is no white space between two entries. Paths to Exclude Type the relative path to the folder that you want to exclude from backups.
- Click Apply.
- The folder filters specified under Global Exclusions tab are defined by the administrator. For more information, see View Global Exclusions list.